Recipes

From savory dishes to sweet indulgences, our recipes are designed to inspire your inner chef, offering step-by-step guidance for a delightful cooking experience. So, let's explore, experiment, and savor the joy of preparing delicious meals together!

Thank you! Your submission has been received!
Oops! Something went wrong while submitting the form.
Soup
Savoury
  • 1 Acorn Squash ~ seeded and cut into pieces
  • 1 Sweet Potato
  • 1 medium sized onion cut up
  • 3 garlic cloves ~ peeled
  • Avocado or Olive oil
  • 1 tsp salt
  • 1/4 tsp pepper
  • 2 cups vegan chicken or veggie broth
  • 1/2 tsp maple syrup
  • 1/2 cup non dairy milk

Place all veggies on parchment lined cooking sheet and drizzle with enough oil to coat. I tend to rub the oil all over the veggies with my hands to ensure coating or you can toss them with oil in a bowl. Bake in preheated oven at 400 degrees until tender.

Remove from oven and allow them to cool.

Place all ingredients but only using 1 1/2 cups of cooked squash (save the remaining squash for another time) in your @vitamixca starting with your liquids then remaining ingredients. Run on low speed and increase until it’s on the highest and allow to blend until nice and smooth. Allowing it to run to almost 10 mins will heat your soup so it is ready to enjoy!

Serve and add toppings as you like

Roasted Acorn Squash & Sweet Potato Soup
Plant-based
Gluten-free

Roasted Acorn Squash & Sweet Potato Soup

A brief introduction for the featured cards used throughout the site and for the recipe page heading section.

View recipe
Dessert
  • 2 cups desiccated coconut
  • 190 grams grams of frozen raspberries
  • 2 tablespoons agave syrup
  • 2 teaspoons vanilla extract
  • 250 grams gluten free and dairy free chocolate pieces for the coating

*you could replace the frozen raspberries with frozen blueberries or frozen strawberries.

  1. In a food processor add the coconut, raspberries, agave and vanilla.
  2. Using the pulse button pulse the mixture a few times until it all starts to form together.
  3. Remove the container and scoop the mixture into a parchment line bread pan. (I used a cake pan, to make mine smaller)
  4. Press and smooth the mixture and them place in the freezer for two hours.
  5. About 10 mins before you remove the mixture from the freezer melt your chocolate pieces in a double boiler or in the microwave.
  6. Remove from the freezer and using the parchment paper lift out the frozen mixture and cut into 7 bars. I cut mine into 2" pieces.
  7. Place 1 piece at a time in the melted chocolate and place on parchment paper until the chocolate is set.
Raspberry Coconut Bars cut after freezing
A homemade chocolate coated bar that is filled with coconut and raspberries.
Plant-based
Gluten-free

Raspberry & Coconut Chocolate Dream Bars

Raspberry and coconut chocolate-covered bars are a delectable fusion of flavors and textures. A harmonious blend of sweet raspberries and tropical coconut is encased in a rich layer of smooth chocolate, creating a satisfying balance between tartness, sweetness, and richness. These bars offer a delightful contrast between the chewiness of coconut and the decadence of chocolate, making them a perfect treat for those seeking a luscious and indulgent snack. With each bite, you experience a symphony of fruity, nutty, and chocolatey notes, making these bars a deliciously irresistible delight for any occasion.

View recipe
Breakfast
Sauces
Dessert
  • 300 grams organic blueberries
  • juice from 1 lemon
  • 2 tablespoons chia seeds
  • 1-2 tablespoons maple syrup or more to taste

  • In a small saucepan over low heat add your washed organic blueberries along with the lemon juice and the maple syrup.
  • Using a fork squish the blueberries down to mash them.
  • Let it simmer for 5-10 mins until the juices have released and it has turned a rich purple color.
  • Remove the pan from the heat and stir in the chia seeds.
  • Allow the mixture to sit until it becomes a thick texture.
  • The jam can be stored in the fridge for up to a week.

Enjoy on toast, crackers, over ice cream, cheesecake or on overnight oats.

Overnight Oats
a bowl of homemade blueberry chia jam
Plant-based
Gluten-free

Blueberry Chia Jam

Homemade blueberry chia jam is a flavorful and nutritious alternative to traditional jams, offering several health benefits. Packed with antioxidants from blueberries and omega-3 fatty acids from chia seeds, this jam supports immune function, heart health, and brain function. Additionally, it's naturally sweetened with a touch of maple syrup or honey, reducing the need for added sugars. Enjoy the delicious taste and nutritional richness of homemade blueberry chia jam as a spread, topping, or ingredient in various recipes.

View recipe
Beverages
  • 2 cups coconut water or you can use filtered water
  • 2 tablespoons of raw honey
  • juice from 1 lemon or orange
  • 1/4 teaspoon pink Himalayan, Celtic or sea salt
  • fresh or frozen fruit slices or pieces (optional)
  • Place all ingredients in a bottle, jar or glass that will hold up to 3 cups of liquid
  • Blend, shake or stir until thoroughly mixed.
  • Enjoy immediately or cover and store in the fridge.
  • This may be consumed all at once or sipped at throughout the day to replenish electrolytes and give a boost of hydration. Excellent source after physical exertion.
  • Fresh or frozen fruit slices may be added to your glass is desired.
  • This can also be doubled or tripled and stored in the fridge for when needed. Consume within two weeks.
multiple glasses of an all natural homemade electrolyte drink with pieces of fresh fruit
Plant-based
Gluten-free

Electrolyte Drink

Homemade electrolyte drinks provide a natural and customizable way to replenish essential minerals lost through sweat during physical activity or illness. By blending ingredients like coconut water, citrus juices, and a pinch of salt, you can restore hydration, support muscle function, and maintain electrolyte balance without artificial additives or excessive sugars found in commercial sports drinks.

View recipe
Canning & Preserving
Breakfast
Dessert
  • mandarin oranges
  • organic cane sugar (or granulated sugar)
  • filtered water
  • use ratio 1:2 (meaning 1 cup sugar to 2 cups water)
  • In a sink half full with warm water and 1 tablespoon baking soda and 1/4 cup vinegar wash your mandarin oranges. Rinse well.
  • Peel your oranges and set the peels aside for another project. Separate your oranges and place in a bowl and set aside.
  • In a medium saucepan over medium heat add the sugar and the water and bring to a simmer. Stirring constantly until sugar dissolves. Turn your heat to the lowest temp possible to keep the syrup hot.
  • Add your mandarin oranges to hot sterilized jars, leaving 1/2" at top of jar. Cover the oranges with the hot simple syrup leaving 1/2" at the top of the jar.
  • Remove any air bubbles by running a chop down the insides of the jar.
  • Wipe the rim of each jar with vinegar on a cloth and place your seal and add the ring only to finger tight.
  • Place your hot jars into your hot water bath canner and bring your water to a boil and allow to boil for 10 mins for 250 ml jars. Make sure each jar is covered by 1 - 2" of water.
  • After the time is up turn off the heat and allow to sit in the canner for 5 minutes and then remove the jars from water, do not tilt the jars.
  • Allow your hot jars to sit on the counter undisturbed for 24 hours. After 24 hours check that each jar has sealed, remove the rings and wipe down each jar, label and place in your storage for later use. Use within one year.
  • Any un sealed jar place in your refrigerator and consume within a week.

To use the peels:

  • Place the peels in a dehydrator and allow them to dehydrate. Place the dehydrated peels in a coffee grinder to create an orange powder for baking, cooking or even in tea.
  • The powder can also be sprinkled in your garden as a natural pesticide.
  • You can also add the orange powder to sea salt and olive oil to create an all natural body scrub or bath soak.
  • The peels un-dehydrated can be added to a glass jar. Cover the peels with vinegar and allow to sit for two weeks and you will have an all natural cleaner for around your house.
  • The peels can also be made into orange candy or you can also make an old fashioned orange marmalade jam.
  • Try not to waste anything around your house, always do some research to see how you can reuse or recycle something before sending it to the land fil.
Mandarin Oranges

jars filled canned mandarin oranges in a simple syrup
Plant-based
Gluten-free

Canned Oranges

Canning your own mandarin oranges allows you to preserve their freshness and nutritional value while controling added sugars and avoiding preservatives commonly found in store-bought varieties. The health benefits of homemade canned mandarin oranges include providing vitamin C for immune support, antioxidants for overall health, and dietary fiber for digestion, making them a nutritious and flavorful addition to your pantry.

View recipe
Dessert
  • 1/2 cup coconut oil,softened
  • 3/4 cup creamy peanut butter
  • 1/2 cup cane sugar or granulated sugar
  • 1/2 cup brown sugar
  • 2 tablespoon non dairy milk
  • 1 teaspoon vanilla extract
  • 1 1/4 cup gluten free flour
  • 1 tsp xanthan gum (if your flour doesn't already have it)
  • 3/4 teaspoon baking soda
  • 1/2 teaspoon baking powder
  • 2 tablespoon corn starch
  • 1/4 teaspoon salt
  1. In a large mixing bowl cream together the coconut oil and sugars.
  2. Mix in the peanut butter until smooth.
  3. Add remaining ingredients except the flour and mix well.
  4. Once it is all mixed fold in the flour, being careful not to over mix.
  5. Roll dough into small balls then roll in sugar.
  6. Place on a parchment lined cookie sheet. About 1" apart.
  7. Gently press down each ball with a fork dipped in water.
  8. Bake in middle of oven for 10-12 minutes or until golden.
  9. Remove from oven and let cool for a bit before transferring to rack to cool completely.
  10. Enjoy with a nice glass of non dairy milk!
A plate of peanut butter cookies.
Plant-based
Gluten-free

Peanut Butter Cookies

Experience the bliss of guilt-free indulgence with our Gluten-Free and Vegan Peanut Butter Cookies. These delectable treats redefine the classic cookie experience, marrying the rich, nutty goodness of premium peanut butter with the wholesome touch of gluten-free and vegan-friendly ingredients

View recipe
Beverages
Breakfast
Canning & Preserving
  • 4 cups fresh or frozen cranberries, preferably organic
  • 8 oz fresh lemons squeezed, preferably organic
  • 2 cups organic cane sugar
  • 6 cups filtered water
  • In a medium sized pot place your cranberries with half of the sugar and cook over low heat, stirring occasionally.
  • Continue to cook until the cranberries become soft, now add the remaining sugar.
  • Keep stirring until all the sugar is dissolved.
  • Remove from heat.
  • Place into a fine mesh strainer and push the cranberries through the sieve to extract the syrup over a glass jug or bowl.
  • When you are done add the lemon juice into the bowl of extracted cranberry juice.
  • Stir well and adjust taste with more lemon juice or sugar.

*do not throw away the left over cranberry pulp after extracting as you can freeze it for baking or dehydrate it to create a powder in a coffee grinder for baking, smoothies, teas etc.

*to make your drink you can add it to water or sparkling water, adjusting the water to your liking. A ratio of 1:1/2 is best.

  • To can your concentrate for later use:
  • Add the lemon cranberry concentrate in a small pot and bring to a boil and then bring your heat to the lowest setting to just keep your liquid hot.
  • Pour your hot concentrate into hot sterilized jars, leaving 1/2 inch at top of jar.
  • Wipe the rim of each jar with vinegar on a cloth and place your canning seal on top and add the ring and tighten to finger tight.
  • Place your hot jars into your hot water bath and bring your water to a boil and allow to boil for 25 mins for 250 ml jars.
  • Make sure each jar is covered by one inch of water. After the time is up turn off the heat and allow to sit for 5minutes and then remove the jars from water, do not tilt the jars and allow them to sit on the counter undisturbed for 24 hours.
  • After 24 hours check that each jar has sealed, remove the rings and wipe down each jar, label and place in your storage for later use. Use within one year.
  • Any unsealed jars can be placed in the fridge and consumed within a week.
Canned Cranberry Lemonade Concentrate
a glass pitcher of cranberry lemonade concentrate mixed with water for a refreshing drink
Plant-based
Gluten-free

Cranberry Lemonade Concentrate

Making homemade cranberry lemonade concentrate involves combining cranberry juice, lemon juice, sugar, and water, then simmering it until reduced into a concentrated syrup. Dilute with water or sparkling water when serving for a refreshing beverage. The health benefits of this concentrate include cranberries' antioxidants and potential urinary tract health support, along with vitamin C from lemon juice, contributing to immune function and skin health.

View recipe
Breakfast
Dessert

Dry Ingredients:

2 cups gluten free oats

1/2 cup gluten free brewers yeast

1/2 teaspoon salt

1 teaspoon cinnamon

2 cups shredded coconut

2 cups ground almonds

1/2 cup brown sugar lightly packed

2 tablespoons flax seed

2 teaspoons baking soda

1 cup all purpose gluten free four or gluten free oat flour

1/2 cup hemp hearts

1 cups gluten and dairy free chocolate chunks or chips

Wet Ingredients:

1 cup melted organic coconut oil, melted

1.5 cups almond or peanut butter, slightly melted

2 teaspoons vanilla extract

6 eggs, room temperature (to prevent coconut oil from solidifying from cold eggs)

1/2 cup honey

This recipe does make a lot of cookies. It is recommended to enjoy up to 3 cookies approximately half an hour before nursing. When I make these cookies I will make an extra batch of the dry ingredients and place the dry mixture in a very large mason jar to have it ready to make the next batch.

  • Preheat your oven to 350 degrees Fahrenheit and make sure the cooking rack is in the center of the oven.
  • In a standing mixer with paddle attachment mix all the wet ingredients together and then add all the dry ingredients and mix well.
  • Place the mixture covered in the fridge for up to an hour for easier handling but this is not necessary.
  • Using a teaspoon, scoop teaspoonfuls of mixture onto a parchment covered cookie sheet. Leaving about 1/2" between cookies.
  • Place on center rack of oven and bake for 12-13 mins.
  • Remove the cookie sheet from the oven and let the cookies sit for 5 minutes before removing the cookies and placing them on a wire rack to cool.

a bowl filled with homemade booby cookies which help with mother's milk production for nursing
Plant-based
Gluten-free

BooBy Cookies

Homemade booby cookies are a tasty, nutrient-rich treat designed to support lactation in breastfeeding mothers. Made with ingredients like oats, flaxseeds, and brewer's yeast, these cookies can help boost milk production while providing essential vitamins, minerals, and fiber. They're a delicious and healthy way to support your body naturally!

View recipe
Beverages
  • 1 cup organic cane sugar
  • 3/4 cup filtered water
  • 1 cup sliced fresh organic ginger root, peeled

In a saucepan on medium heat combine the sugar and water.

Stir constantly until the sugar is dissolved.

Add the ginger and continue to heat, bringing the syrup to a light boil.

Cover, reduce heat and allow the mixture to simmer for about 15 minutes.

Remove from heat and allow to cool and let it steep in the covered pan for about 1 hour or until it reaches your preferred taste.

Strain out the ginger and bottle under a tight seal and keep in the refrigerator to prevent it from fermenting.

Mix into your favorite drinks, baking etc. and enjoy.

*this will keep for up to two weeks or more when kept in the fridge.

*it can also be made with a vanilla bean to create vanilla ginger syrup for a nice flavor or add in some homemade lemon extract

*ginger syrup can also be used on pancakes or crepes, add to tea or use in your baking.

a jar containing homemade ginger syrup and a glass with carbonated water and ginger syrup creating a natural gingerale drink
Plant-based
Gluten-free

Simple Ginger Syrup

Homemade ginger syrup is easy to make by simmering fresh ginger with water and sugar, then straining it. It's a flavorful addition to beverages like tea, cocktails, or sparkling water. Health benefits of ginger syrup include soothing digestion, easing nausea, and providing anti-inflammatory properties. Add it to sparkling water to make an Italian Soda.

View recipe
Sauces
Dessert
Canning & Preserving
  • Vanilla beans (about 5-6 per 1 cup of alcohol)
  • Vodka (or another alcohol like rum or bourbon)
  • Glass bottle or jar with a tight seal
  • Split the vanilla beans lengthwise to expose the seeds.
  • Place the beans in a glass bottle or jar.
  • Pour vodka (or chosen alcohol) over the beans, ensuring they are fully submerged.
  • Seal the bottle and store it in a cool, dark place.
  • Shake the bottle gently every few days.
  • Let the mixture infuse for at least 2 months (the longer, the better), then use as needed.
  • a flip top bottle of homemade vanilla extract containing vanilla beans and vodka
    Plant-based
    Gluten-free

    Vanilla Extract

    Making homemade vanilla extract is a simple and rewarding process that offers several benefits. By using high-quality vanilla beans and alcohol, you can create a pure, flavorful extract without the artificial additives or preservatives found in store-bought versions. Homemade vanilla extract is cost-effective and customizable. Additionally, it makes for a thoughtful and personalized gift. Using homemade vanilla extract enhances the taste of your baked goods, desserts, and beverages with rich, authentic vanilla flavor.

    View recipe
    Breakfast
    Dessert
    • 1/3 cup cornstarch
    • 1/2 cup sugar
    • 1/4 teaspoon salt
    • 3 cups non dairy milk
    • 1 tablespoon vegan margarine
    • 1 teaspoon vanilla extract
    • 2 cups cooked white rice
    • 1/4 cup raisons, optional
    • Cinnamon and or nutmeg, optional
    1. Cook rice according to directions and set aside.
    2. If you want to add raisons place 1/4 cup raisons in boiling water and set aside.
    3. In a medium saucepan combine cornstarch, sugar and salt.
    4. Gradually add milk and stir well.
    5. Over medium heat, bring mix to a boil. Boil for 2 minutes, stirring constantly to ensure even thickening or non scalding of milk.
    6. Once its a good consistency remove from the stove.
    7. Stir in margarine and vanilla and combine well.
    8. Add in your rice and stir well.
    9. If your using raisons, drain them and add to the mixture.
    10. Pour into bowls and serve.

    *you could also add a small amount of cinnamon or nutmeg to add a different flavor to the rice pudding.

    *your pudding will last for a few days in the fridge in a closed container, you can even slightly heat it up before serving.

    A bowl full of creamy homemade rice pudding
    Plant-based
    Gluten-free

    Rice Pudding

    Indulge in the simple pleasure of our Homemade Creamy Rice Pudding—a classic dessert that brings comfort and nostalgia to every spoonful. Crafted with care, this velvety treat combines tender rice grains with rich, creamy goodness, delicately sweetened and perfumed with hints of vanilla and cinnamon. Served warm or chilled, it's a timeless delight that captures the essence of home and the warmth of cherished family recipes.

    View recipe
    Savoury
    • olive oil
    • course sea salt
    • 3 washed russet potatoes
    • vegan mayonaise, aioli sauce or other dips (optional)
    • Preheat the oven to 375 °F.
    • Wash the potatoes well and pat them dry. Remove any blemishes or potato eyes.
    • Run a wooden skewer through each potato and cut each potato into a spiral using a small, sharp knife by turning the potato as you cut or place the potato on two skewers and cut through until you meet the skewers and then flip the potato over and repeat, this will create a spiral effect, (the thinner you cut the spirals, the crispier they will be).
    • You can also use a hand spiraler.
    • Once spiraled gently loosen up the potato to create some space between the spiral’s and place in your prepared baking dish.
    • In a bowl, pour some olive oil and brush the potatoes with it.
    • Bake the spiraled potatoes for 20 minutes. Then flip them over, brush with the other side with olive oil and bake for another 10-15 minutes until the potatoes are crispy.
    • Remove them from the oven and sprinkle with coarse sea salt to taste. Serve with aioli, vegan mayonnaise or dips of choice.
    • Enjoy!

    *you don't have to peel the potatoes but if you do scrub them well first and cut away blemishes and keep the peel to make homemade potato chips. You won't be disappointed and you won't be wasting food!

    Healthy Homemade Potato Chips from leftover peels
    A baking dish with three spiral cut potatoes baked in the oven with oil and spices..
    Plant-based
    Gluten-free

    Spiraled Potatoes

    Savor the crispy goodness of baked spiraled potatoes, a delicious and wholesome dish that's both visually appealing and satisfying. Prepared with minimal oil and flavorful spices, these spiralized potatoes offer a healthier twist on traditional potato dishes. Plus, potatoes are packed with essential nutrients like vitamin C, potassium, and dietary fiber. Incorporating potatoes into your diet can support heart health, aid digestion, regulate blood pressure, and provide sustained energy. Enjoy the crispy perfection of baked spiraled potatoes while benefiting from the nutritional richness of this versatile root vegetable.

    View recipe
    Canning & Preserving
    Sauces
    Savoury

    • 28 oz of diced tomatoes, (can tomatoes can be used)
    • 2 tablespoons of olive oil
    • 1 teaspoon garlic powder (8 fresh cloves minced)
    • 1 tablespoon fried oregano (2 1/4 tablespoon fresh)
    • 1 teaspoon sea salt
    • 1 teaspoon dried basil (2 chopped fresh leaves)
    • 1 teaspoon granulated sugar (or more to taste)
    1. In a medium sized sauce pan over medium heat add all ingredients and mix well.
    2. Reduce heat and allow to simmer for 20 mins.
    3. Taste and adjust spices, sugar and salt if needed.
    4. It is ready to use or can if you like. It can also be kept in the fridge for up to a week or frozen.
    5. To can the sauce for later use:
    6. Add your hot pizza sauce to hot sterilized jars, leaving 1/2 inch at top of jar. Remove any air bubbles and wipe the rim of each jar with vinegar on a cloth and place your seal and add the ring only to finger tight. Place your hot jars into your hot water bath and bring your water to a boil and allow to boil for 35 mins for 250 ml jars. Make sure each jar is covered by one inch of water. After the time is up turn off the heat and allow to sit for 5 minutes and then remove the jars from water, do not tilt the jars and allow them to sit on the counter undisturbed for 24 hours.
    7. After 24 hours check that each jar has sealed, remove the rings and wipe down each jar, label and place in your storage for later use. Use within one year.
    greek pizza dough with homemade pizza sauce on it
    Plant-based
    Gluten-free

    Canned Pizza Sauce

    Homemade canned pizza sauce is a versatile and flavorful sauce made from fresh tomatoes, herbs, and spices. It offers the convenience of being preserved for future use while maintaining the rich taste of homemade ingredients. It can be customized to suit individual preferences and provides a delicious base for homemade pizzas, pasta dishes, and more.

    View recipe
    No items found.
    • 12 ounce mason jar with lid
    • large pink Himalayan sea salt crystals or 1/4 cup ground pink Himalayan sea salt
    • filtered water
    • Place your Himalayan sea salt crystals or ground salt into our mason jar or jar with lid
    • Add enough water to fill the jar
    • Place the lid on the jar to seal it
    • Give the jar a good shake and then set it aside
    • Allow to sit for 12 - 24 hours
    • If the salt dissolves after 24 hours add more salt in small amounts until it no longer dissolves
    • To ensure full saturation, make sure there is always some undissolved salt in the mix and continue to fill the mason jar up to the shoulder with water.
    • This saturated mixture can last for a very long time.

    To use Sole add one teaspoon to a glass of water, fruit juice sparkling water etc. For added flavor you can add some slices of fresh or frozen fruit, cucumber slices, mint leaves etc.

    Water with added Sole, fresh fruit and mint leaves
    a jar with himalyan sea salt and filtered water to create a natural electrolyte drink called sole
    Plant-based
    Gluten-free

    Sole

    Sole is a concentrated solution of water and pink Himalayan salt that has been fully saturated, creating a mineral-rich elixir. Advocates claim that consuming sole may provide various health benefits, including improved hydration, electrolyte balance, and mineral absorption due to its rich mineral content.

    View recipe
    Soup
    • 5 cups vegetable broth
    • 1 large white onion chopped
    • 3 tomatoes chopped
    • 2 tomatoes minced
    • 1/2 zucchini cut into 1/2 small pieces
    • 1 carrot cut into small pieces
    • 1 can chick peas drained (save liquid from chick peas for aquafaba*)
    • 1 can red kidney beans drained
    • 1/4 tsp red pepper flakes
    • 1 tsp dried oregano
    • 1/2 cup fresh basil chopped
    • 1/2 tsp salt and pepper each
    • 1 cup of gluten free pasta of choice
    • Place all ingredients in a large pot and bring to a boil.
    • Reduce heat and let simmer for 20 mins
    • Serve and enjoy with some homemade gluten free vegan bread.
    Minestrone Soup Ingredients
    Plant-based
    Gluten-free

    Minestrone Soup

    This vegan and gluten free Minestrone Soup is a delicious and nutritious twist on the classic Italian dish.

    View recipe
    Sauces
    Savoury
    • 28 ounces of canned tomatoes
    • 1 medium onion minced
    • 2 large garlic cloves
    • 2 tablespoon olive oil
    • 1 teaspoon dried oregano
    • pinch of red pepper flakes
    • salt to taste
    • Place all the above ingredients in your Vitamix Blender or high powered blender and blend on high until smooth
    • You can pour the mix into a medium saucepan and heat through or you can keep blending in your Vitamix on high for about 10 mins and it will heat up the mix.
    • Serve over your favorite pasta or gnocchi.

    *salt can be adjusted to taste and a little cane sugar can be added if the tomatoes taste bitter.

    a bowl of homemade marinara sauce with a side of pasta
    Plant-based
    Gluten-free

    Marinara Sauce

    Homemade marinara sauce is a flavorful tomato-based sauce typically made with ingredients like tomatoes, garlic, onions, and herbs. It offers health benefits by providing a rich source of vitamins, minerals, and antioxidants from the tomatoes and other vegetables. These nutrients may support overall health, including heart health, immune function, and inflammation reduction. Additionally, homemade marinara sauce allows for control over ingredients like salt and sugar, promoting a healthier option compared to store-bought varieties.

    View recipe
    Beverages
    • 3 cups fresh strawberries
    • 7 cups water total
    • 1 cup cane sugar or more to taste
    • 2 cups freshly squeezed lemon juice
    • sliced strawberries, lemon slices to add to pitcher before serving and mint sprigs are optional
    1. In a small pot add sugar and 2 cups of the water.
    2. Heat through until sugar is dissolved. Remove from heat.
    3. Place your strawberries and 1cup of water in a Vitamix blender ( or high powered blender) and blend until smooth.
    4. In a serving pitcher combine your strawberry puree, sugar water, lemon juice and the remaining 4 cups of water.
    5. Stir thoroughly and chill until ready to serve.
    6. Add lemon slices, sliced strawberries and mint sprigs just before serving.
    A serving pitcher of homemade strawberry lemonade.
    Plant-based
    Gluten-free

    Homemade Strawberry Lemonade

    Indulge in the vibrant medley of flavors with our Homemade Strawberry Lemonade. Crafted with love and the freshest ingredients, this delightful concoction combines the sweet essence of sun-ripened strawberries with the zesty kick of freshly squeezed lemons.

    View recipe
    Dessert
    • 2 cups fresh strawberries
    • 1 1/4 cups non dairy milk
    • 2 teaspoons apple cider vinegar
    • 1/2 cup vegan butter, softened to room temperature
    • 1/2 cup neutral flavored oil
    • 1 1/2 cups granulated sugar
    • 1 tablespoon vanilla extract
    • 1/2 teaspoon pink food coloring, optional
    • 3 cups all purpose
    • 1 tablespoon baking powder
    • 1/2 teaspoon salt

    Strawberry Frosting

    • 1 cup freeze dried strawberries
    • 1 cup vegan butter, softened
    • 3 cups powdered sugar
    • 2 teaspoons vanilla extract
    • 2-3 tablespoons non dairy milk
    1. Prepare the strawberry puree: Using a Vitamix blender or food processor, puree the prepared strawberries (washed and stems removed). Pour the strawberry puree into a small pot on the stove on medium heat and allow to simmer for 25-30 minutes, stirring occasionally. Allow to simmer until you have an approximate amount left of 1/2 cup.
    2. Preheat your oven to 350 degrees F and prepare 2 8-inch round cake pans by spraying with oil or lining the bottom of the pans with parchment paper.
    3. Make the vegan buttermilk: Combine by stirring the non dairy milk with the apple cider vinegar. Set aside.
    4. In a standing mixer with the whisk attachment, cream together the softened butter, oil and sugar. Add in the vanilla and pink food coloring. Mix well.
    5. In a separate medium sized bowl, whisk together the flour, baking powder and salt.
    6. In your standing mixer, add the flour mixture, vegan buttermilk, strawberry puree, to the bowl with the butter/oil/sugar mixture, mix until well combined. Scraping the sides and bottom of the bowl as needed.
    7. Pour the cake batter evenly into the two prepared pans, and bake for 30-35 minutes, or until a toothpick inserted comes out clean.
    8. Allow the cakes to cool in the pans for 15 minutes. Then remove and place them on a cooling rack.
    9. Prepare the Strawberry Frosting (do this while your cake is cooking)
    10. Using a Vitamix blender, blend the freeze dried strawberries into a fine powder and set aside.
    11. Using your stand mixer with the paddle attachment, beat the vegan butter with the powdered sugar until its well combined.
    12. Now add the strawberry powder and mix well. Add in the vanilla and 2-3 tablespoons of non dairy milk, 1 tablespoon at a time until you reach the desired consistency.
    13. Make sure the cakes are completely cooled, if so go ahead and frost them with the strawberry icing, decorate with more strawberries if you wish! Enjoy!
    14. The cake will keep at room temperature for up to 4 days covered.
    A homemade strawberry cake made with real strawberries.
    Plant-based
    Gluten-free

    Strawberry Cake

    Bursting with the sweet essence of ripe strawberries, this cake is a true celebration. The strawberries infuse each bite with their juicy sweetness, creating a sensation of pure bliss with every forkful. Strawberries are not only delicious but also offer numerous health benefits. Packed with antioxidants, fiber, and vitamin C, they support heart health, boost the immune system, aid in digestion, promote skin health, and may even help reduce the risk of certain cancers. Incorporating strawberries into your diet is a flavorful way to support overall wellbeing and enjoy a sweet treat.

    View recipe
    Dessert

    Base Ingredients

    • 160g gluten free graham crackers
    • 1/4 vegan margarine melted

    Cheesecake Layer

    • 2 cups raw cashews https://amzn.to/3w8tMeI
    • 1/2 cup of coconut cream
    • 1/4 cup Maple Syrup
    • 1 tablespoon coconut oil
    • 1/2 tsp vanilla extract
    • 1 tablespoon lemon juice

    Fruit Topping

    • 2 1/2 cups frozen berries (I used raspberries)
    • 1/2 cup of granulated sugar
    • 1/2 cup of water
    • 2 teaspoons cornstarch
    • 2 tablespoons water
    • 1/2 teaspoon vanilla extract
    • 1 teaspoon vegan margarine
    1. Soak the raw cashews in hot water and set aside. Drain cashews before using. Proceed to making the base layer.
    2. Crush graham crackers either by hand or in a food processor and place in a medium sized bowl.
    3. Add melted butter and mix thoroughly. Pour crumb mixture into a springform pan and press down.
    4. Using a Vitamix blender https://amzn.to/3umo74j add coconut cream, coconut oil, vanilla, maple syrup, lemon juice and then the cashews, in this order.
    5. Blend by starting at low and working your way up to the highest speed and allow to blend until it is nice and smooth.
    6. Pour the cashew cheesecake over the base and smooth the top.
    7. Place your cheesecake in the freezer until ready to serve.
    8. Now make your fruit topping.
    9. In a medium sized saucepan over medium heat, add berries, sugar, water.
    10. While waiting for it to come to a boil mix the cornstarch and 2 teaspoons of water in a small dish and set aside.
    11. Once the berry mix is boiling bring heat to medium and add the cornstarch slurry, mixing constantly until mixed through.
    12. Remove the pan from the heat and stir in the vanilla and margarine. Allow to cool in the pan and place in sealed container until ready to serve the cheesecake.

    *To serve the cheesecake remove from freezer a few minutes before serving and cut into pieces and place on a plate. Scoop some of the berry topping on top of the cheesecake and Enjoy!

    *Keep remaining cheesecake in the freezer until ready to enjoy again.

    *Precutting the cheesecake when you first remove it and freezing as individual pieces makes for easier removal for your next serving.

    *Keep berry topping in fridge until ready to use.

    Showing a raw vegan gluten free cheesecake made with raw cashews and topped with a vegan raspberry topping.
    Plant-based
    Gluten-free

    Raw Cheesecake with Raspberry Sauce

    A raw vegan cheesecake with a berry topping is a guilt-free indulgence that combines wholesome ingredients to create a decadent treat. Crafted without dairy or refined sugars, the cheesecake features a luscious, creamy filling made from nuts and coconut cream, on a base of graham crumbs. Topped with your choice of berries in a sauce, this dessert not only satisfies sweet cravings but also delivers a burst of antioxidants and natural sweetness. Indulge in the rich, creamy texture and fruity freshness of this raw vegan cheesecake for a delightful and health-conscious dessert experience.

    View recipe
    Breakfast
    Dessert
    • 1 cup ripe mashed bananas
    • 1 teaspoon vanilla extract
    • 2 tablespoons aquafaba or (1 large egg for vegetarian option)
    • 1/2 cup dairy free yogurt or sour cream
    • 1/2 cup vegetable oil
    • 1/2 teaspoon salt
    • 1 1/2 teaspoon baking powder
    • 1/2 teaspoon baking soda
    • 3/4 cup sugar
    • 1 3/4 cups all purpose gluten free flour
    • 1 teaspoon of xanthan gum (if your flour doesn't have it)
    • 3/4 cup dairy and gluten free chocolate chips or chunks
    • Preheat your oven to 350 degrees Fahrenheit. Placing the oven rack in the middle of the oven.
    • Line a 12 muffin tin with muffin liners and set aside.
    • In a medium sized bowl add your bananas and mash well.
    • In the same bowl add all the other ingredients except the flour and xanthan gum.
    • Mix until well combined.
    • Add the flour and xanthan gum to the bowl and slowly fold the dry into the wet mixture.
    • Only mix until just combined, do not overmix as this will create moist muffins. Overmixing will cause muffins to dry out.
    • Scoop muffin mixture into liners at 2/3 full.
    • Place in a preheated oven and bake until golden brown and cooked through. The muffins are ready when a toothpick inserted into the center comes out clean.
    • Enjoy!

    *you can fold in dried fruit and or nuts at the end with the flour for a different flavor.

    baked homemade banana chocolate chip muffins lined up on a cooling rack
    Plant-based
    Gluten-free

    Chocolate Chip Banana Muffins ~ One Bowl

    Turn overripe bananas into wholesome, dairy-free, gluten-free banana chocolate chip muffins! These tasty treats not only prevent food waste but also provide natural sweetness, fiber, and nutrients like potassium—perfect for a healthier snack or dessert."

    View recipe
    Sauces
    Dessert
    Breakfast
    • 2 1/2 cups frozen raspberries
    • 1/2 cup granulated sugar
    • 1/2 cup of water
    • 2 teaspoons of cornstarch
    • 2 tablespoons water
    • 1/2 teaspoon vanilla extract
    • 1 teaspoon of vegan margarine
    1. In a medium sized saucepan over medium heat, add berries, sugar, water.
    2. While waiting for it to come to a boil mix the cornstarch and 2 teaspoons of water in a small dish and set aside.
    3. Once the berry mix is boiling bring heat to medium and add the cornstarch slurry, mixing constantly until mixed through.
    4. Remove the pan from the heat and stir in the vanilla and margarine. Allow to cool in the pan and place in sealed container until ready to serve.

    *this is a good recipe to use on my raw cheesecake recipe or as a topping for many other deserts etc.

    Raspberry Sauce on my Raw Vegan Cheesecake ~ recipe can be found on this website
    A plate of pastries served with a side dish of homemade raspberry sauce or topping.
    Plant-based
    Gluten-free

    Raspberry Sauce/Topping

    Raspberry sauce is a delightful and versatile accompaniment that effortlessly elevates various dishes. Bursting with the vibrant flavor of raspberries, this sauce adds a sweet and slightly tart kick to desserts, breakfast items, and savory dishes. Whether drizzled over pancakes, swirled into yogurt, or paired with grilled meats, the luscious texture and bright taste of raspberry sauce bring a burst of summer to every bite. Easy to prepare, it's a must-have in your culinary repertoire for enhancing the overall enjoyment of a wide array of culinary creations.

    View recipe
    Savoury
    • olive oil
    • 140 grams white onion, thinly sliced
    • 450 grams firm tofu cut into small slices
    • 20 gram rock sugar or 1 tablespoon white sugar
    • 2 tablespoon light soy sauce
    • 1 tablespoon dark soy sauce
    • 2 tablespoon Shaoxing rice wine
    • 1/2 teaspoon Chinese 5 spice powder
    • 1/4 teaspoon ground white pepper
    • 5 shiitake mushrooms, rehydrated and diced

    4 portions plain steamed rice

    blanched Gai Lan

    1. Make sauce by adding soy sauces, rice wine, 5 spice powder, sugar and pepper in a small bowl and set aside.
    2. Heat oil in pan and add onions, cook until tender and brown.
    3. Add the diced mushrooms, fry for two minutes them add the sliced tofu and fry until browned.
    4. Add the sauce to the tofu and some of the water from the soaked mushrooms and stir well. Cover and let simmer until most of the liquid is gone.
    5. Serve in a bowl on fresh cooked rice with some blanched gai lan as well.
    Taiwanese Tofu Rice Bowl
    Plant-based
    Gluten-free

    Taiwanese Tofu Rice Bowl

    My vegan version of a classic Taiwanese Braised Pork Rice Bowl

    View recipe
    Beverages
    • 1 cup water
    • 1 tsp turmeric powder (or fresh grated turmeric),
    • 1/2 tsp grated ginger
    • a pinch of black pepper
    • juice of 1/2 lemon.
    • 1 tablespoon of honey (or more to taste)

    this can be doubled or more if you wish to make more cubes

    • Mix the water, turmeric powder (or fresh grated turmeric), grated ginger, a pinch of black pepper, honey and lemon juice in a measuring cup with a pouring spout.
    • Once it is all mixed pour it into ice cube trays and freeze.
    • Once frozen add a cube to hot water, tea or smoothie and enjoy!
    a glass filled with a turmeric tea to drink for its anti inflammatory properties
    Plant-based
    Gluten-free

    Turmeric Anti Inflammatory Cubes for Tea

    Turmeric Anti-Inflammatory Tea Cubes are a convenient way to enjoy the health benefits of turmeric anytime by simply adding a cube to hot water, tea, or smoothies. These frozen cubes combine turmeric with ginger, black pepper, honey and lemon, creating a powerful anti-inflammatory blend that's easy to use daily and are a great way to replace your ibuprofen. Turmeric is known to ease the pain of different forms of arthritis and may help in the prevention of cancer.

    View recipe
    Savoury
    Canning & Preserving
    Fermentation
    • one small head of purple cabbage
    • 3 tablespoons sea salt
    • 6 cups filtered water
    1. Wash your purple cabbage and remove any bad outer layers. If you can reserve a couple large leafs than these can be used in place of the fermentation weights to keep the fermenting cabbage below the salt brine.
    2. Sterilize two 32oz pickling jars.
    3. Shred cabbage and place into the sterilized jars.
    4. Stir the sea salt into the filtered water until the salt has completely dissolved.
    5. Pour the water and salt mix "brine" over each jar of shredded cabbage making sure it covers the cabbage. Use fermented weights to keep the cabbage below the salt brine. If you have a couple large outer leaves of the cabbage you can place these in the jar on top of the shredded cabbage to keep it below the brine while it is fermenting.
    6. Place lid on each jar but do not screw on tight, just somewhat loose.
    7. Set your jars aside in a warm place out of sunlight and make sure to "burp" each jar every 1 - 2 days by opening the jars and letting the gasses escape. Then place the lids back on and not tight.
    8. The fermentation should take about 7 - 10 days but checking on the tanginess after 5 - 6 days.
    9. Once its reached the level of tanginess you like place your sauerkraut in the refrigerator and store for up to 3-4 weeks.
    10. Enjoy!
    two jars of homemade purple sauerkraut
    Plant-based
    Gluten-free

    Purple Sauerkraut

    Savor the tangy goodness of homemade purple sauerkraut, a vibrant and flavorful addition to your diet. Made with shredded purple cabbage and fermented with salt, this traditional dish boasts numerous health benefits. Purple cabbage is rich in antioxidants, vitamins, and fiber, supporting immune function, digestion, and heart health. Fermentation enhances the nutritional value of sauerkraut by promoting the growth of probiotics, beneficial bacteria that promote gut health and overall well-being. Incorporate homemade purple sauerkraut into your meals to enjoy its delicious taste and reap the nutritional rewards of this fermented delicacy.

    View recipe
    Breakfast
    Dessert
    • 1/3 cup Real maple Syrup
    • 1/3 cup Nut Butter of your choice
    • 1 teaspoon Vanilla Extract
    • 1/2 teaspoon Salt
    • 1 tablespoon Cinnamon
    • 2 cups Gluten free Rolled Oats
    • 1/2 cup Cashews chopped
    • 1/2 cup slivered Almonds
    • 1/2 cup unsweetened coconut
    • 1/2 cup Medjool Dates chopped
    1. Pre-heat oven to 350 degrees F.
    2. Place all ingredients in a large bowl and mix well.
    3. Spread mixture on a parchment lined cookie sheet.
    4. Bake in center of oven for 20 minutes or until golden color.
    5. Allow to cool and store in a tightly sealed container.
    6. Enjoy as is, with yogurt and fruit, as an ice cream or smoothie bowl topping and more.
    Homemade Healthy Granola
    Plant-based
    Gluten-free

    Healthy Granola

    This delicious healthy granola recipe is naturally sweetened with maple syrup and is made with oats, coconut, dates and nuts.

    View recipe
    Canning & Preserving
    • 4 pounds small cucumbers
    • 1/4 cup pickling salt
    • 3 cups white vinegar
    • 3 cups filtered water
    • fresh dill sprigs
    • fresh garlic cloves (optional)
    • hot pepper flakes (optional)
    • Wash your cucumbers really well and place them in a large bowl
    • Cover the cucumbers with cold water and allow them to sit over night
    • The next day drain and rinse the cucumbers with cold water
    • Now you can quarter, slice or coin your cucumbers and set them aside
    • Rinse the fresh dill sprigs and set aside
    • In a medium pot over medium heat add the water, vinegar and salt and bring to a boil. This is your pickling brine.
    • Allow to boil stirring occasionally until all the salt has dissolved, lower heat to minimum to keep the brine hot.
    • In the bottom of a hot sterilized jar place a dill sprig (and a couple garlic cloves if using, a few hot pepper flakes if making spicy), fill the jar now with your cut cucumbers.
    • Add another dill sprig on top and tuck it into the cucumbers.
    • Pour some hot brine in the jar over the cucumbers leaving 1/2 " headspace.
    • Using a chopstick immerse the stick inside the jar along the sides to remove any bubbles.
    • Wipe the top of each jar with some vinegar on a clean cloth.
    • Apply your canning seal and add the ring tightening only finger tight.
    • Place the jar in your hot water bath canner.
    • Repeat this process with each jar until your canner is full.
    • Bring the water to a boil and allow to boil for 20 minutes. Make sure the water is covering the jars by 1 - 2". I used 250ml canning jars.
    • When time is up, turn off the heat, remove the lid and allow the jars to sit in the canner for 5 minutes.
    • Remove the jars one by one and place on your counter allowing them to sit undisturbed for 24 hours.
    • After 24 hours remove the rings and check to make each jar has a seal. The center of the seal with be down and you should be able to pick up the jar by the seal.
    • Wipe down your jars with hot soap water, label your jars and place in your storage. Consume within 18 months.
    • For any jars that did not seal they can be placed in the fridge for consuming.
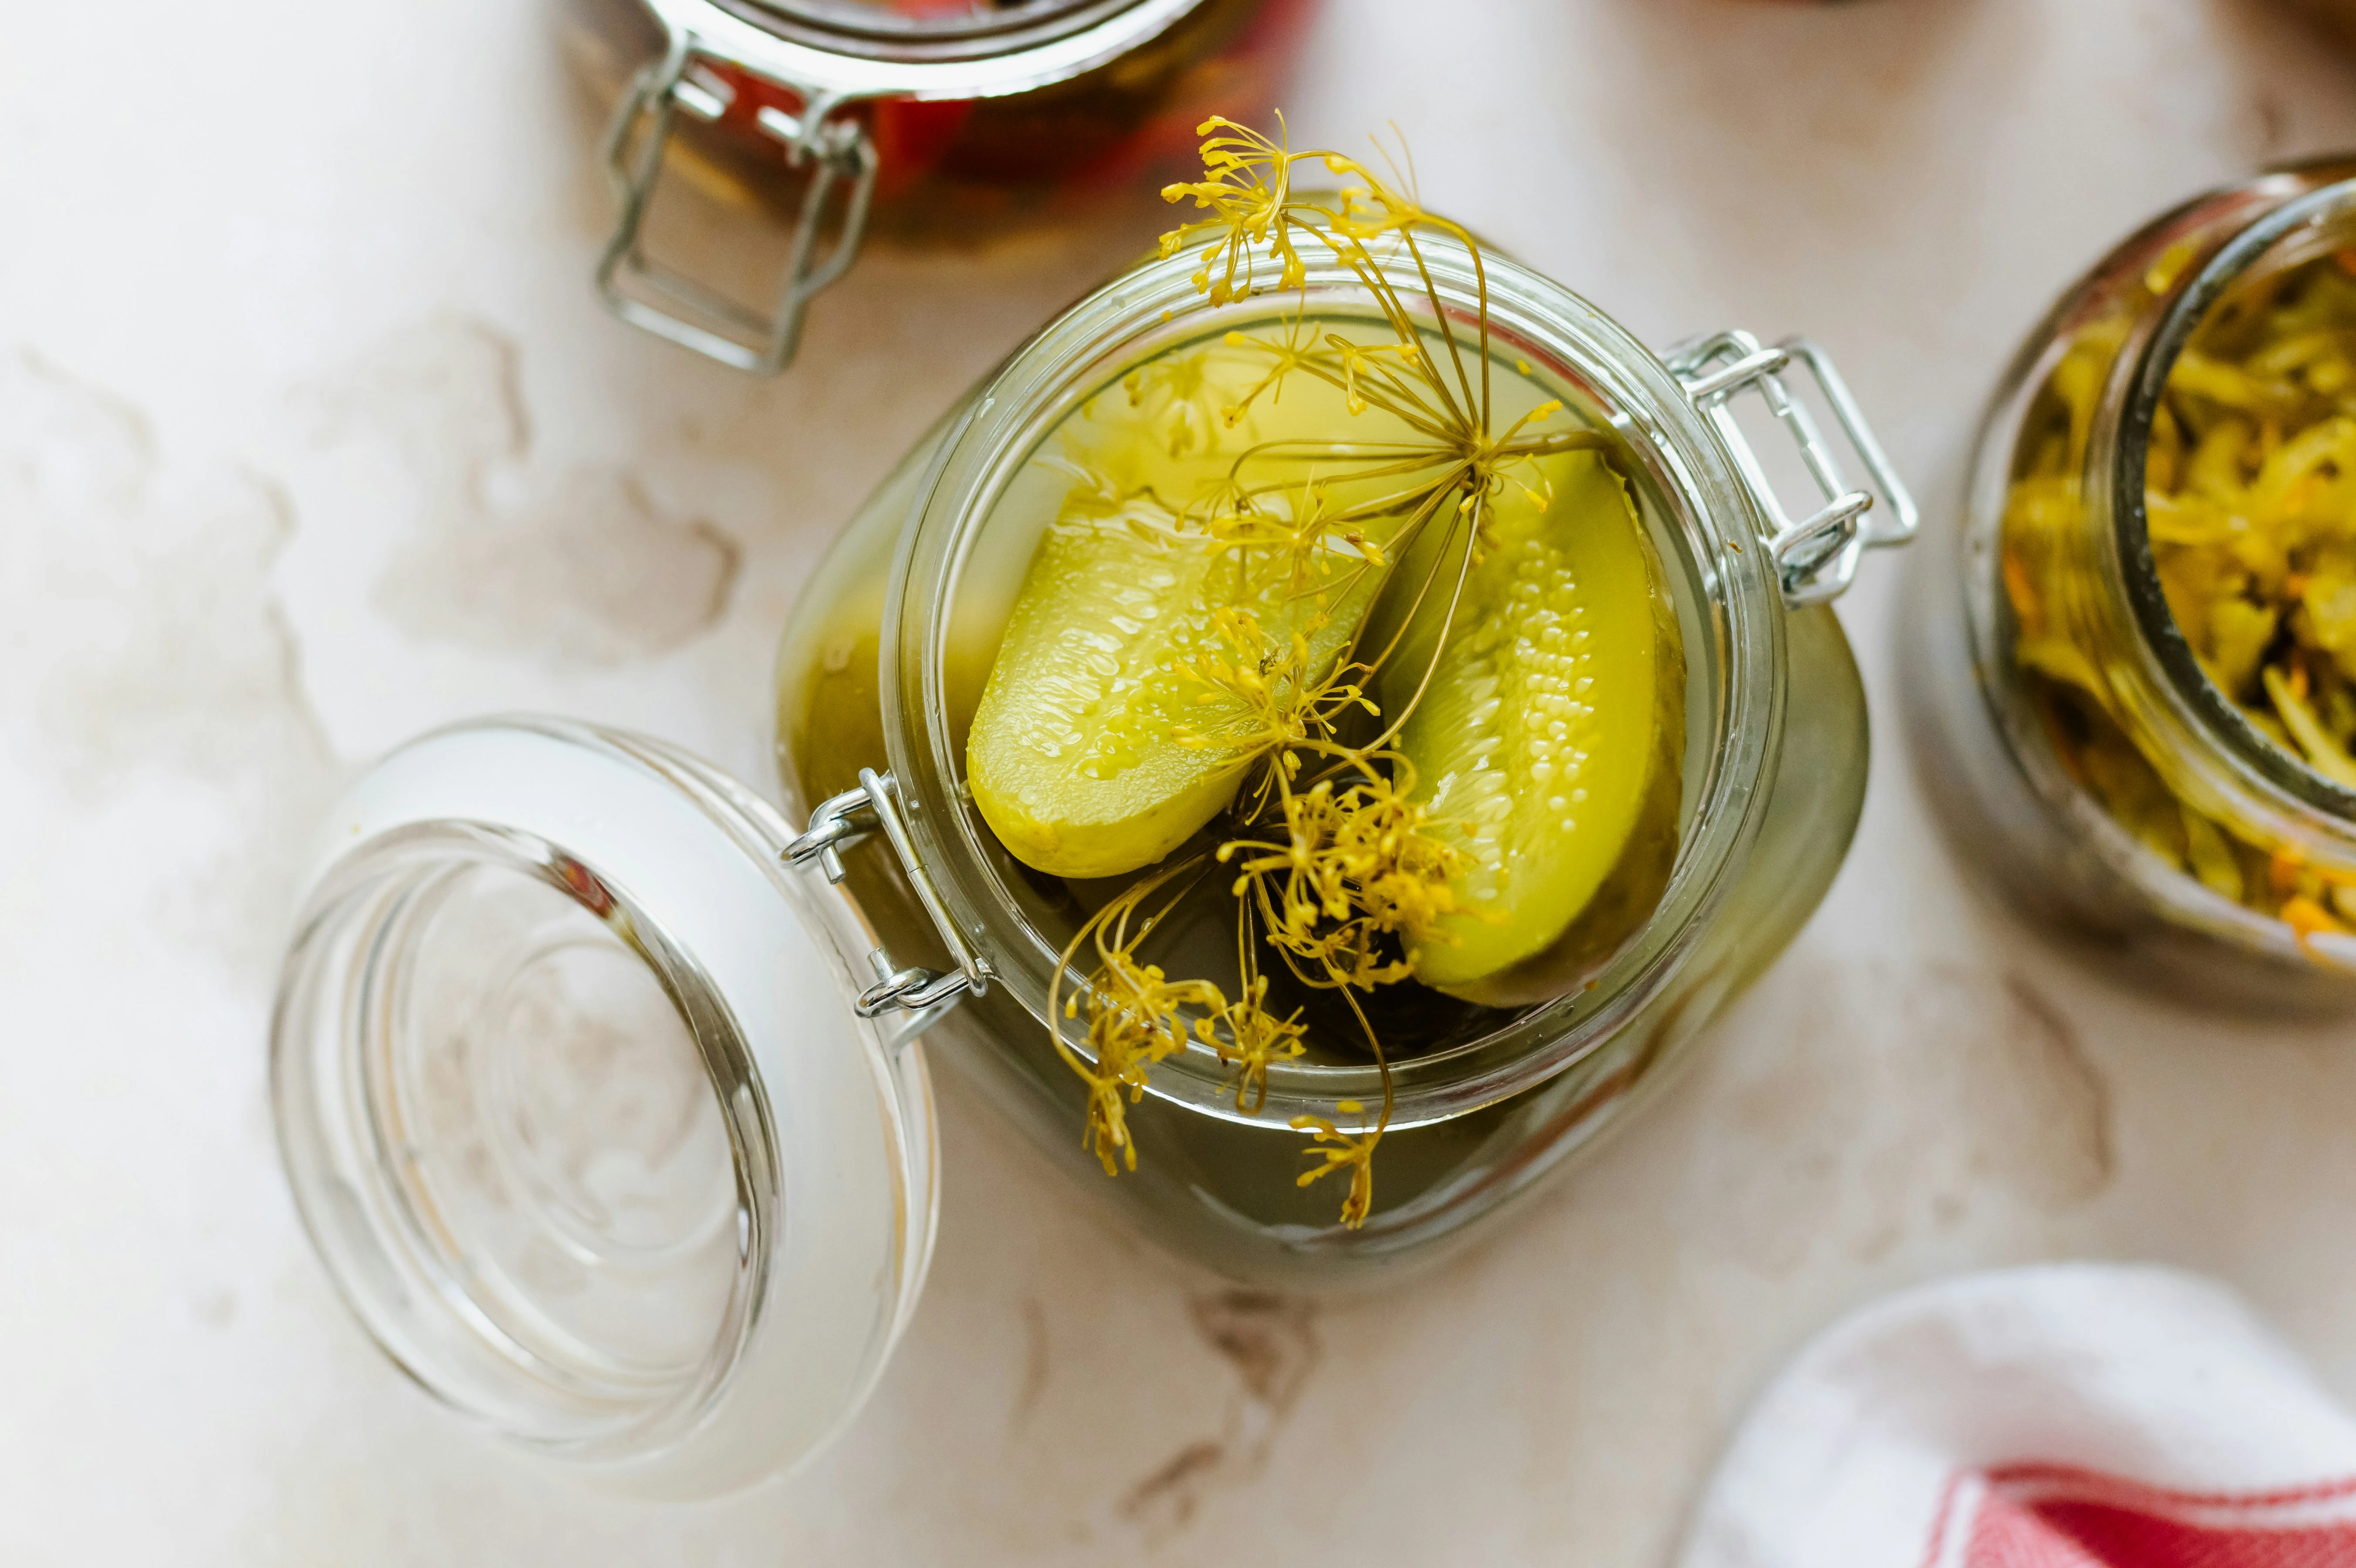
    Small Pickling Cucumber with Fresh Dill Sprigs

    [

    jars with homemade canned dill pickles
    Plant-based
    Gluten-free

    Dill Pickles ~ My Mom's Recipe

    Growing up my mom made a lot of homemade dill pickles every summer and I remember never getting enough of them. Making homemade dill pickles offers health benefits such as probiotics from fermentation, which promote gut health and digestion. Additionally, homemade pickles allow you to control ingredients like salt making them a lower-sodium and healthier alternative to store-bought varieties.

    View recipe
    Savoury

    Ham Roast

    • 19 oz can chickpeas, drained (keep the liquid from the peas "aquafaba" for future baking)
    • 3/4 cup vegan chicken broth
    • 2 tablespoons olive oil
    • 2 tablespoons nutritional yeast
    • 1/4 cup can tomatoes drained
    • 1 tablespoon maple syrup
    • 1 teaspoon paprika
    • 1/4 teaspoon ground cloves
    • 1 teaspoon onion powder
    • 1/2 teaspoon garlic powder
    • 1 3/4 cup gluten free flour
    • 1/4 psyllium husk powder
    • 3-4 cups more of chicken or vegetable broth, for steaming

    Maple Glaze

    • 4 tablespoons melted vegan margarine
    • 1/2 cup brown sugar, lightly packed
    • 1/2 cup pure maple syrup
    • 1 tablespoon dijon mustard
    • 1/4 teaspoon ground cinnamon

    For Roasting

    • whole cloves, approximately 20 (optional)
    • canned or fresh pineapple rings, about 10-12 (optional)
    1. In a Vitamix blender or food processor, add drained chick peas, broth olive oil nutritional yeast, tomatoes, maple syrup, paprika, cloves, onion powder and garlic powder and blend or process until smooth.
    2. Transfer the blended mixture to a large mixing bowl.
    3. Add the gluten free flour, psyllium husk to wet mixture and stir with a spoon until you need to use your hands and mix unti it starts to come together. Sprinkle a small amount of flour on a clean surface and knead about 10 times.
    4. Shape the dough into a loaf.
    5. Using a large pot with steaming basket, place the loaf inside the basket with about 3 cups of the broth on the bottom for steaming the loaf. Do not let the ham sit in the broth.
    6. Cover, bring to a boil, then reduce heat so ites simmering but not at a rolling boil.
    7. Steam for an hour and add broth if it gets low.
    8. Remove the pot from the stove and remove lid and allow the loaf to cool for a few minutes.
    9. Preheat your oven to 425 degrees F.
    10. In a medium size bowl whisk all the glaze ingredients together and set aside.
    11. Place the steamed ham in a casserole dish and score it in a criss cross pattern. You can place whole cloves in the diamonds if you wish.
    12. Pour half of the glaze over the ham and place the pineapple rings around the roast.
    13. Place in the oven to roast for 30 minutes. Checking it every 10 minutes and baste with more glaze. Try to keep some glaze to pour over ham just before serving.
    14. When completed cooking allow to cool for 15 minutes, remove the cloves, slice and serve!
    A picture of a sliced gluten free vegan ham.
    Plant-based
    Gluten-free

    Vegan Ham Roast with Maple Glaze

    Vegan gluten-free ham offers a delicious plant-based alternative to traditional ham, catering to dietary preferences and restrictions without sacrificing flavor or texture. Crafted from wholesome ingredients and seasoned with savory herbs and spices, this meatless option provides all the taste and satisfaction of ham without the use of animal products or gluten-containing ingredients. Vegan gluten-free ham provides a tasty and versatile option for sandwiches, salads, and entrees, allowing you to enjoy your favorite dishes with peace of mind and culinary creativity.

    View recipe
    Canning & Preserving
    Dessert
    Breakfast
    • 6 pounds apples
    • 3/4 cup water
    • 3/4 cup brown sugar (or more to taste)
    • 1 teaspoon cinnamon (or more to taste)
    • Wash your apples well and peel and core them. Set your apple peels aside to make apple cider vinegar
    • Slice your apples and set aside in a large bowl.
    • In a large saucepan add the sliced apples and the water over medium high heat.
    • Bring to a boil and reduce heat to simmer.
    • Allow the apples to simmer stirring often to avoid scorching your apples.
    • Once the apples reach a consistency you like you can remove them from the heat.
    • Depending on how you like your apple sauce you can just use your spoon to mash up most of the apples and leave some chunks or you can add them to your Vitamix and blend until smooth.
    • If your not using the blender you can add the sugar and cinnamon to the apples while you are stirring and breaking them up. If using the blender you can add the sugar and cinnamon to the blender with the apples.
    • Pour your hot apple sauce into hot sterilized jars, leaving 1/2 inch at top of jar.
    • Remove any air bubbles using a chopstick down the insides of the jar.
    • Wipe the rim of each jar with vinegar on a cloth and place your canning seal on top of the jar and add the ring only to finger tight.
    • Place your hot jars into your hot water bath and bring your water to a boil and allow to boil for 20 mins for 500 ml jars.
    • Make sure each jar is covered by 1 -2 inches of water.
    • After the time is up turn off the heat and allow to sit for 5 minutes in the water bath canner and then remove the jars from water, do not tilt the jars and allow them to sit on the counter undisturbed for 24 hours. After 24 hours check that each jar has sealed, remove the rings and wipe down each jar with hot soapy water, label and place in your storage for later use. Use within one year. Any unsealed jar can be placed in your refrigerator and consumed within a couple weeks.
    jars of homemade canned apple sauce
    Plant-based
    Gluten-free

    Apple Sauce

    Homemade applesauce is a nutritious and delicious addition to your diet, offering numerous health benefits. Made from fresh apples and minimal added sugars, homemade applesauce is rich in fiber, vitamins, and antioxidants. It supports digestive health, aids in weight management, and promotes heart health by lowering cholesterol levels. Enjoy the natural sweetness and nutritional goodness of homemade applesauce as a versatile and wholesome snack or ingredient in various recipes.

    View recipe
    Beverages
    • 1/2 cup coconut water
    • 1/2 orange juice
    • 1/4 cup tart cherry juice
    • 1 tsp sole (find recipe here)
    • 1 magnesium bisglycinate gel capsule

    You can double or triple this to keep it on hand. Store in the refrigerator.

    • add all the liquid ingredients into a glass or bottle and mix or shake well.
    • to add the magnesium, gently pull the capsule open and add the magnesium powder to the liquids and mix really well.
    • Drink before bedtime to aid in sleep.

    *Coconut water is a refreshing and hydrating beverage that offers several health benefits. Packed with electrolytes like potassium, magnesium, and sodium, coconut water helps replenish fluids and minerals lost through sweat, making it an excellent choice for hydration after exercise or in hot weather. It's low in calories and naturally free of fat and cholesterol, making it a healthy alternative to sugary drinks. Additionally, coconut water contains antioxidants, vitamins, and minerals that support overall health, digestion, and immune function. There are about 19.2 milligrams of calcium in one cup of coconut water, according to a sample analyzed by the USDA.

    **Orange juice is a favorite beverage high in antioxidants and micronutrients like vitamin C, folate, and potassium. Regular consumption has been associated with several health benefits, including improved heart health, decreased inflammation, and a reduced risk of kidney stones.

    *Tart cherry juice is renowned for its numerous health benefits, particularly its potential to improve sleep quality. Rich in antioxidants and compounds like melatonin, tart cherry juice has been linked to promoting better sleep by regulating the sleep-wake cycle and increasing overall sleep duration. Consuming tart cherry juice regularly may help reduce insomnia symptoms, enhance sleep efficiency, and improve sleep onset latency, making it a natural and effective sleep aid. Incorporate tart cherry juice into your bedtime routine to enjoy its soothing effects and support a restful night's sleep.

    *Sole, a concentrated saltwater solution made by dissolving Himalayan salt in water, is believed to offer various health benefits. Advocates suggest that consuming sole may help balance electrolytes, promote hydration, support digestion, and improve overall mineral balance in the body due to its rich mineral content. However, scientific evidence supporting these claims is limited, and individuals should exercise caution and moderation when using sole as a health supplement.

    *Magnesium bisglycinate is also known as magnesium diglycinate and magnesium glycinate. Magnesium is a vital nutrient for regulating many body processes, including muscle and nerve function, blood sugar levels, and blood pressure. This mineral also supports the making of protein, bone, and DNA. Magnesium glycinate is a well-regarded supplement known for its potential to contribute to better sleep and alleviate overall anxiousness.

    two glasses of a mixture called bedtime or sleep tonic
    Plant-based
    Gluten-free

    Bedtime Tonic for Sleep and Overall Health

    Here’s a Bedtime Tonic recipe that promotes relaxation, supports sleep, and enhances overall health. This drink combines tart cherry juice (for natural melatonin), orange juice (for vitamin C and flavor), magnesium (to help relax muscles and nerves), and other soothing ingredients.

    View recipe
    No items found.
    • 2 cups gluten free flour
    • 2 teaspoons xanthan gum only if your flour doesn't already have it
    • 1 1/2 teaspoons baking powder
    • 3/4 teaspoons salt
    • 1/4 teaspoons baking soda
    • 1 cup granulated or cane sugar
    • 3/4 cup dairy free milk
    • 1/2 cup plain dairy free yogurt
    • 1/4 cup vegetable oil
    • 1/4 cup freshly squeezed lemon juice
    • zest of 2 small lemons = 1 tablespoon total
    • 1 teaspoon pure vanilla extract

    1. Preheat oven to 350 degrees F.
    2. Grease a 9x5 loaf pan.
    3. In a large bowl, combine all of the dry ingredients.
    4. In a separate bowl, combine all the wet ingredients and then add the wet ingredients to the dry, then stir until just evenly mixed. Do not over mix as this will cause your loaf to become dry.
    5. Pour the mixture into the pan and spread evenly. Bake for 50-55 minutes, or until the loaf has risen and a toothpick inserted into the center comes out clean.
    6. If you would like a frosting you can mix 1/2 cup powdered sugar combined with 1 teaspoon dairy free milk of choice.
    7. Enjoy!
    A baked lemon loaf that is a copy cat to the famous Starbucks lemon loaf.
    Plant-based
    Gluten-free

    Lemon Loaf - Starbuck Copycat

    Indulge in a delightful vegan gluten-free lemon loaf, perfect for satisfying your sweet cravings without compromising on dietary preferences. Made with fresh lemon juice, this moist and tangy treat offers a burst of citrus flavor in every bite. Plus, lemons, the star ingredient, provide numerous health benefits, including being rich in vitamin C, antioxidants, and soluble fiber. Incorporating lemons into your diet can support immune function, aid digestion, promote hydration, and contribute to overall well-being. Enjoy the zesty goodness of this lemon loaf while reaping the nutritional benefits of this versatile citrus fruit.

    View recipe
    Beverages
    Breakfast
    • 1 tablespoon apple cider vinegar
    • 1 tablespoon fresh lemon juice
    • 1/4 teaspoon turmeric
    • pinch of cayenne or black pepper (to enhance the beneficial curcumin in the turmeric)
    • 6 tablespoons of water
    1. Stir all ingredients or place them in a blender and pulse until thoroughly combined.
    2. Pour gut shot into individual small bottles or in one sealable larger bottle and keep in the fridge until ready to consume.

    *Drink 1 (2ounce) shot a day on an empty stomach, in the morning preferable for the fastest absorption.

    *Consume both shots within 24 hours for maximum nutritional potency.

    *You can make extra shots ahead by freezing them in an ice cube tray and removing them when frozen and placing them in a freezable container or bag.

    *To consume frozen shot place one frozen cube in a glass with 4 ice cubes and and refrigerate overnight. Stir the shot in the morning before drinking.

    *If you prefer a sweeter shot you can replace the water with coconut water or half water and half orange juice.

    Four small bottles of individual apple cider vinegar gut shots
    Plant-based
    Gluten-free

    Lemon and Apple Cider Vinegar Gut Shots

    Apple cider vinegar gut shots are small, concentrated doses of apple cider vinegar that are consumed for their potential health benefits. These shots are believed to support digestive health and overall well-being due to their high concentration of acetic acid, which may aid in digestion, balance gut bacteria, and help regulate blood sugar levels. Additionally, apple cider vinegar gut shots are rich in enzymes and beneficial bacteria, which can promote a healthy gut microbiome. Incorporating these shots into your daily routine may contribute to improved digestion, increased energy levels, and enhanced immunity.

    View recipe
    Beverages
    Breakfast
    Dessert
    Sauces
    • 1/2 cup of organic cane sugar
    • 1/2 cup hot water
    • 2 tablespoons ceremonial grade Matcha Powder
    • in a small pot add the hot water and bring to a boil
    • add the sugar and whisk using a Matcha bamboo whisk or regular whisk if you don't have a bamboo one
    • now whisk in the Matcha powder until combined
    • remove the syrup from the stove and allow it to cool
    • pour your cooled Matcha syrup in a glass bottle with a lid and store it in the refrigerator until needed
    Matcha Powder with a traditional Bamboo Matcha Whisk

    a glass with soy milk and added matcha syrup to make an iced matcha latte
    Plant-based
    Gluten-free

    Matcha Syrup

    Matcha syrup is a concentrated liquid made from matcha powder, sugar, and water. It can be used as a sweetener and flavoring agent in various beverages and desserts, such as matcha lattes, cocktails, and drizzling over ice cream or pancakes. In terms of health benefits, matcha syrup retains some of the antioxidant properties of matcha powder, which may contribute to overall health and well-being. Making your own Match syrup also allows you to control the amount of the sugar content. Additionally, using high-quality matcha powder in the syrup can enhance its nutritional value.

    View recipe
    Breakfast
    Fermentation
    Dessert
    Sauces
      • 2 cups raw cashews
      • 1/2 cups filtered water
      • pinch of sea salt
      • 5 capsules probiotics (about 1/2 teaspoon)

    Instructions:

    • soak your cashews in fresh water overnight, approx. 24 hours
    • drain and rinse your cashews
    • add the cashews and the filtered water to a high powered blender like the Vitamix and blend until smooth, approximately 3-4 minutes
    • pour cashew yogurt into a clean dry glass bowl or jar
    • open the probiotic capsules and pour the powder into the yogurt, using a silicone, plastic or wooden spoon mix the powder into the cashew yogurt
    • cover your jar with cheesecloth and using an elastic to keep the cheesecloth on tight
    • place your jar in your unheated oven with the light on for 24-48 hours
    • after 24 hours check your yogurt for tanginess, if not tangy enough leave longer in the oven
    • once it is done stir your yogurt and place a lid on and keep it in the fridge, it will thicken as it sits
    • you can sweeten your yogurt with maple syrup, honey or sweetener of your choice, add vanilla or fruit etc.
    • your yogurt should last in the fridge for about two weeks
    • for a thicker Greek like yogurt, you can place the yogurt in a cheesecloth, tie it and allow to sit over a bowl for a few hours to allow the liquid to drain off to create a thicker yogurt
    • if you decide to leave it to drain for 24 hours or more you will have a vegan cheese that you can add nutritional yeast, herbs and flavorings of your choice

    *make sure to never use metal utensils when making your yogurt as the metals with destroy the beneficial probiotics

    Health Benefits: Cashew yogurt is full of healthy fats, vitamins, and minerals, plus beneficial probiotics that promote gut health, support digestion, and boost immunity.

    a bowl of homemade vegan yogurt made from cashews
    Plant-based
    Gluten-free

    Vegan Cashew Yogurt

    Vegan Cashew Yogurt is creamy, smooth, and filled with probiotics, making it a delicious dairy-free alternative! Cashews have a natural sweetness and richness, making this yogurt a great base for breakfast or snacks.

    View recipe
    No items found.
    • enough zest from a lemon to fill half a flip top bottle
    • pure vodka
    • flip top bottles
    • Place the grated lemon zest in a glass bottle or jar.
    • Pour vodka (or chosen alcohol) over the zest, ensuring they are fully submerged.
    • Seal the bottle and store it in a cool, dark place.
    • Shake the bottle gently every few days.
    • Let the mixture infuse for at least 2 months (the longer, the better), then use as needed.

    You can also use orange zest to make an orange extract.

    a flip top bottle that is filled with lemon zest and pure vodka to create a homemade lemon extract
    Plant-based
    Gluten-free

    Lemon Extract

    Homemade lemon extract is a vibrant, natural flavoring made by infusing lemon zest in alcohol. It’s free from artificial additives, easy to make, and offers a fresh citrusy boost to baked goods, marinades, and beverages. Plus, lemons are rich in antioxidants and vitamin C, adding both flavor and potential health benefits!

    View recipe
    Breakfast
    Dessert
    Savoury
    • 2 cups gluten free flour
    • 2 teaspoons Xanthan gum if your flour doesn't have it already
    • 1 cup granulated sugar
    • 1 1/2 tablespoons baking powder
    • 1 teaspoon salt
    • 1/2 cup (8 tablespoons) vegan margarine, melted
    • 1/2 cup neutral oil (like vegetable oil)
    • 1 1/4 cups of non dairy milk
    • 3 large eggs or 4 tablespoons aquafaba if making it vegan
    • honey or vegan margarine for serving
    1. Preheat oven to 350 degrees and grease a 9x13 baking dish.
    2. In a large bowl whisk together, flour, xanthan gum, cornmeal, sugar, baking powder and salt.
    3. In a medium bowl mix together margarine, oil, milk and eggs.
    4. Add wet ingredients to the bowl of dry ingredients and mix only until combined. Over mixing may cause bread to be dry.
    5. Transfer the batter to the prepared baking dish and bake from 35 - 40 minutes in preheated oven until golden and a toothpick comes out clean.
    6. Allow the cornbread to cool for approximately 15 minutes in the pan before cutting into squares.
    7. Serve with butter and or honey if desired.
    8. Store in an airtight container at room temperature up to 3 days or in the fridge for a week.
    Dish of baked cornbread
    Plant-based
    Gluten-free

    Super Moist Cornbread

    Today, we're diving into the heart and soul of Southern comfort food with a classic that needs no introduction – Cornbread. A golden-brown masterpiece that graces tables with its warm, crumbly embrace, cornbread is more than just a side dish; it's a legacy, a taste of tradition, and a nod to the rich tapestry of American culinary history.

    View recipe
    Savoury
    • 2 tablespoon dried basil
    • 2 tablespoon dried oregano
    • 2 tablespoon dried parsley
    • 1 tablespoon rosemary
    • 1 tablespoon thyme leaves
    • 1 tablespoon red pepper flakes
    • 1 teaspoon garlic
    • Combine all ingredients in a small bowl.
    • Mix well and store in an airtight container in a cool, dark place.
    • Use 1-2 teaspoons in recipes as needed.

    This blend is versatile, easy to make, and adds a burst of Italian flavor to any dish!

    a mortar and pestle mixing up spices to make a homemade Italian spice blend
    Plant-based
    Gluten-free

    Italian Spice Blend

    A Homemade Italian Spice Blend is a simple, flavorful mix of dried herbs that enhances pasta, pizza, sauces, and roasted vegetables. Making it at home allows you to adjust flavors to your taste, while ensuring a fresh, aromatic mix free from additives.

    View recipe
    Canning & Preserving
    Savoury
    Soup
    • gluten free ramen noodles ( I prefer Lotus Foods Organic Millet and Brown Rice Ramen Noodles)
    • dehydrated vegetables of your choice, ( I use peas, corn, carrot, mushrooms, broccoli etc)
    • 1 tablespoon homemade vegan bouillon (or more to tase)
    • salt and pepper to taste
    • Line up your pint jars on your counter (as many as you want to make ahead)
    • place one brick (break as needed) inside your pint jar
    • add 1 tablespoon each of your chosen dehydrated vegetables
    • add 1 tablespoon of the vegan bouillon
    • place lid on your jar and store in your cupboard until ready to consume

    When ready to consume add enough boiling water to the shoulder of the jar and place the lid on.

    Being very careful as the jar can become very hot; give the jar a good shake and set aside for 10 - 15 mins.

    Open carefully and enjoy your nutritious homemade ramen soup! Add salt and pepper to taste.

    a ladle filled with homemade glutenfree vegan ramen noodle with dehydrated vegetables and a homemade vegan broth
    Plant-based
    Gluten-free

    Ramen Soup - Homemade Vegan Gluten Free and Dry Canned

    Homemade Vegan Gluten-Free Ramen Soup crafted with dehydrated vegetables and homemade vegan bouillon offers a wholesome and allergen-friendly twist on a beloved classic. Packed with nourishing ingredients like gluten-free noodles, nutrient-rich dehydrated veggies, and a flavorful vegan broth, this hearty soup provides a satisfying and comforting meal. By avoiding common allergens and artificial additives, it promotes digestive wellness and supports a balanced diet, making it a deliciously healthy choice for everyone to enjoy.

    View recipe
    Dessert
    • 16 oz or 15 sheets of gluten free graham crackers
    • 1 1/2 cups of non dairy milk
    • 7 oz vanilla pudding mix (2 small boxes)
    • 8 oz vegan cream cheese softened
    • 3 cups non dairy whip cream
    • 3 cups fresh strawberries sliced or chopped for layering
    • 12-15 sliced fresh strawberries for topping
    1. Wash strawberries and pat dry. Then slice all strawberries keeping 12-15 aside for the topping.
    2. In a medium bowl mix the vanilla pudding with the softened cream cheese.
    3. Add in the milk and whisk until smooth.
    4. Fold in the whip cream into the pudding and cream cheese mixture. Mix until thoroughly combined.
    5. Grease a 9x13 inch dish and add a thin layer of the pudding mixture on the the bottom.
    6. Add a single layer of graham crackers. Break cookies if needed to fit.
    7. Spread a layer of pudding mixture on top of graham crackers to cover using a spatula.
    8. Spoon and spread 1/3 of the berries on top of the pudding layer.
    9. Repeat the layers, graham crackers then pudding mixture then berries, repeating two more times.
    10. Cover the dish with saran wrap and chill in fridge for at least 4 hours.

    notes: make sure cream cheese is at room temperature. Ensure cake chills minimum 4 hours before cutting. You can replace half of the strawberries with blueberries.

    A baking dish of strawberry ice box cake. A delicious layer of vegan cream cheese whip cream, strawberries and graham crackers.
    Plant-based
    Gluten-free

    Strawberry Icebox Cake

    Introducing our Strawberry Ice Box Cake – a luscious, no-bake dessert that's as beautiful as it is delicious. This divine creation is a symphony of flavors and textures, featuring layers of vegan cream cheese, fluffy whipped cream, ripe strawberries, and the classic crunch of graham crackers.

    View recipe
    Savoury
    • 2 cups cooked day old rice for best results
    • 1 tablespoon of sesame oil
    • 1-2 cloves of garlic minced
    • 1 inch fresh ginger minced
    • 1 cup frozen mixed vegetables (carrot, peas, corn) unthawed, drained
    • 1 - 1 1/2 cups of Vegan Kimchi (find the recipe on this site)
    • 1 tablespoon Tamari sauce
    1. Over medium-high temperature, heat your Wok until its hot and then add the oil.
    2. Add your garlic and ginger and stir frequently for about 30 - 60 seconds.
    3. Now add the rice, kimchi, mixed vegetables and mix well, cooking for about 3-4 minutes.
    4. Add Tamari and mix thoroughly. More tamari may be added if needed.
    5. Remove from heat and enjoy!
    Vegan Kimchi ~ Recipe available on this website
    a bowl of rich in nutrient kimchi rice
    Plant-based
    Gluten-free

    Kimchi Rice

    Kimchi rice is a flavorful and nutritious dish that combines the traditional Korean staple, kimchi, with rice. Kimchi, fermented cabbage with red pepper, garlic, ginger, and other seasonings, adds a punch of taste and probiotics to the rice, creating a savory and tangy flavor profile. This dish not only excites the taste buds but also comes with several health benefits such as probiotics, rich in vitamins and minerals, has antioxidants and is low in calories.

    View recipe
    Savoury
    • 4 cups water
    • 2 tablespoons olive oil
    • 1/2 teaspoon dried basil or 2 sprigs fresh basil
    • 1 white onion halved then sliced
    • 4 cloves fresh garlic minced
    • 12 oz can tomatoes or halved cherry tomatoes
    • 12 oz gluten free linguine pasta
    • salt and pepper to taste
    • 1/4 teaspoon of hot pepper flakes (optional)
    • Combine all ingredients together in a large pot and bring to a boil over high heat.
    • Allow to cook and stir to keep pasta from sticking together.
    • Cook for approximately 9 minutes until the pasta is al dente and the water is nearly evaporated.
    • Serve and enjoy.
    All ingredients in a single pot - One Pot Pasta
    A pot with all the ingredients cooked together called one pot pasta
    Plant-based
    Gluten-free

    One Pot Pasta

    Savor the convenience and nutrition of gluten-free vegan one-pot pasta, a flavorful and wholesome meal that's both easy to prepare and satisfying to enjoy. Made with gluten-free pasta, fresh tomatoes and flavorful herbs and spices, this dish offers a delicious alternative to traditional pasta recipes. Embrace the simplicity and nourishment of gluten-free vegan one-pot pasta for a delicious and wholesome dining experience.

    View recipe
    Savoury
    Sauces
    • 1 cup water
    • 1 cup rice vinegar
    • 1 cup granulated sugar
    • 2 teaspoons fresh ginger root, minced
    • 2 teaspoons hot chili pepper, minced
    • 1 teaspoon fresh garlic, minced
    • 2 teaspoons ketchup
    • 2 teaspoons cornstarch
    • 1 tablespoon water, as needed
    1. Pour water and vinegar into a saucepan; bring to a boil over high heat.
    2. When it reaches boil stir in sugar, ginger, chili pepper, ketchup, and the garlic. Let it simmer for 5 minutes.
    3. While its simmering place the cornstarch in a small bowl; mix in the water until it's smooth.
    4. Whisk the cornstarch mixture into chili sauce.
    5. Remove the saucepan from the stove and pour the very hot mixture into a sterilized canning jar with a new seal and lid or you can place the cooled mixture into a regular jar or container and refrigerate it until its needed.
    A jar of sweet thai chili sauce
    Plant-based
    Gluten-free

    Sweet Thai Chili Sauce

    Sweet Thai chili sauce is incredibly versatile and can be used in various ways: such as dipping sauce, marinade, condiment or salad dressing. Sweet Thai chili sauce is a delightful addition to many dishes, offering a perfect balance of sweet, spicy, and tangy flavors.

    View recipe
    Savoury
    • 1 cup dry lentils (you can use green or brown)
    • 2 1/2 cups vegetable broth
    • 3 tablespoons ground flaxseeds
    • 1/3 cup water
    • 2 tablespoons olive oil
    • 2 garlic cloves minced
    • 1 small white onion diced
    • 1 small carrot grated
    • 1 celery stalk diced
    • 3/4 cup gluten free oats
    • 1/2 cup gluten free bread crumbs (or crushed gluten free crackers)
    • 2 teaspoons Italian seasoning
    • 1 teaspoons garlic powder
    • 1 teaspoons of onion powder
    • salt and pepper

    Glaze

    • 3 tablespoons Ketchup
    • 1 tablespoon apple cider vinegar
    • 1 tablespoon maple syrup
    1. Prepare you lentils by rinsing and removing any odd pieces.
    2. In a large pot add the 2 1/2 cups of the vegetable broth. Bring to a boil and then reduce heat, cover and simmer about 35 minutes, stirring occasionally. When lentils are cooked remove them from the stove and allow to cool. Leave any remaining water in the pot as the lentils will absorb the water as they sit. This should take approximately 15 minutes.
    3. While they are cooling mix 1/3 cup of water with the flaxseed meal in a small bowl and place in the fridge to allow it to thicken.
    4. Preheat your oven now to 350 degrees.
    5. In a sauté pan heat the oil on medium. Add your garlic, onion, carrots, and celery and sauté for about 5 minutes.
    6. Add the spices to the sautéed vegetables and mix well. Set aside and allow to cool.
    7. Using a high powered blender like a Vitamix, an immersion blender or food processor blend 3/4 of the cooked lentils.
    8. Place all ingredients in a medium sized bowl and mix really well.
    9. Place mixture in a 9x5 loaf pan that is greased with Vegan margarine or parchment paper if you prefer and press mixture down.
    10. Prepare your glaze by mixing all three ingredients in bowl and spread evenly over the top of the loaf.
    11. Bake in the center of your oven for about 45 minutes. When loaf is cooked let it sit on the counter for a few minutes before slicing.
    12. Enjoy!
    Lentil Meetloaf
    Plant-based
    Gluten-free

    Lentil Meetloaf

    Lentil meatloaf offers a tasty and nutritious twist on a classic dish, suitable for vegans and those on a gluten-free diet. Packed with protein-rich lentils, wholesome vegetables, and flavorful herbs and spices, it provides essential nutrients like fiber, iron, and folate. This plant-based alternative to traditional meatloaf supports heart health, aids digestion, and promotes satiety, making it a satisfying and nourishing meal option. Enjoy the savory goodness of lentil meatloaf guilt-free, knowing it's both delicious and packed with health benefits.

    View recipe
    Dessert
    • 4 tbsp melted vegan margarine
    • 5 fresh persimmons
    • 4 tbsp aquafaba
    • 2 cups coconut sugar
    • 1 tsp baking soda
    • 1 cup vegan buttermilk (1 cup milk alternative with 2 tsp vinegar added)
    • 1 1/2 cups gluten free flour
    • 2 1/2 tsp baking powder
    • 1 cup vegan cream (I used silk half and half)
    • 1/4 tsp sea salt
    • 1/2 tsp vanilla extract
    • 1 tsp cinnamon

    Heat oven to 325 degrees and grease 2 x 8 inch round baking dish.Purée persimmons in a @vitamixca or high power blender until smooth. Measure out 2 cups and save the remainder to be used for topping. 
Combine all ingredients (except flour) in a large bowl and stir until well mixed. 
Add in gluten-free flour now and mix well.

    Transfer batter to prepared baking dishes and bake until pudding is set, 1 hour to 1 hour 15 minutes. While it’s cooking, blend 1-2 tbsp sugar to remaining persimmon puree to use as your baked pudding topping. Let cool in pans before removing. Then top with purée and serve. Enjoy

    Homemade gluten free and vegan persimmon pudding cake.
    Plant-based
    Gluten-free

    Persimmon Pudding

    Super moist, delicious and healthy! It’s the time of year when fresh Persimmons are available in our local grocery. Each year I purchase some and look for new and exciting ways to enjoy them. Today it was in a baked pudding and it turned out amazing!

    View recipe
    Savoury
    • 1 tablespoon olive oil
    • 1 cup of sliced fresh mushrooms ( i prefer cremini)
    • 1 cup chopped celery
    • 1 cup of chopped white onions
    • 3 cups of fresh bean sprouts
    • 3 green onions, chopped
    • salt and pepper

    Sauce

    • 1 teaspoon brown sugar
    • 1 teaspoon sesame oil
    • 3 teaspoons gluten free soy sauce
    • 1 teaspoon garlic powder
    1. Heat your pan and oil, now add in your mushrooms, sprinkle some salt and pepper and fry for a couple of minutes.
    2. Now add in the celery and onions, sprinkle some more salt and pepper.
    3. Let the mixture cook for a couple of minutes with the lid on to let it steam,
    4. Stir the bean sprouts into the pan and allow this to steam for a couple more minutes.
    5. When you reach the texture of the sprouts you like add in the sauce, green onions and stir constantly until heated through.
    6. Remove from heat and enjoy!
    A bowl of vegetable chow mien.
    Plant-based
    Gluten-free

    Vegetable Chow Mein

    Vegetable Chow Mein is a popular Chinese stir-fried noodle dish that typically consists of stir-fried noodles, but today we have just a vegetable version with a variety of vegetables. The dish whips up quick and is known for its savory flavor.

    View recipe
    Breakfast
    Dessert
    • 1 cup porridge oats
    • 1 teaspoon chia seeds
    • 1 cup of dairy free milk or dairy free kefir
    • 3 tablespoons (heaping) dairy free Greek yoghurt
    • small pinch of salt
    • 1 teaspoon vanilla extract
    • 2-3 teaspoons maple syrup or more to taste
    • toppings e.g. fresh fruit, nuts, raisons, coconut etc
    • Add all the above ingredients to two pint sized mason jar minus the toppings
    • mix all the ingredients really well
    • top with your favorite toppings and place lid and ring on jar
    • place jar in the refrigerator overnight

    Other toppings could be preserves like Blueberry Chia Jam, dark chocolate chips, flax seed, your options are endless.

    You don't have to add the toppings when making, they can even be added right before you consume your overnight oats.

    You can make multiple jars ahead up to a weeks worth.

    Overnight Oats without toppings

    a mason jar with overnight oats topped with fruit
    Plant-based
    Gluten-free

    Overnight Oats

    Overnight oats are a convenient and nutritious breakfast option that offers numerous health benefits. Made by soaking oats in liquid (such as milk or yogurt) overnight, this dish is rich in fiber, protein, and essential nutrients. It promotes satiety, aids in digestion, and helps regulate blood sugar levels. Additionally, overnight oats are customizable with various toppings like fruits, nuts, seeds, and spices, making them a versatile and delicious way to start your day while supporting overall well-being.

    View recipe
    No items found.
    • olive or avocado oil
    • potato peels from washed potatoes
    • sea salt
    1. Soak potato peels in ice cold water for about 5 minutes.
    2. Drain, pat dry and place in a medium sized bowl.
    3. Toss with some oil of your choice and place on a parchment lined baking tray, sprinkle with sea salt.
    4. Bake in your preheated oven at 375 degrees F for about 15 - 20 minutes or you can bake them in your air fryer for about 10 - 15 mins at 375 degrees F. or until crispy and brown.
    5. Enjoy!
    Potato Peels about to be patted dry to be baked in the air fryer
    A bowl full of healthy homemade potato chips made from potato peels to not waste food
    Plant-based
    Gluten-free

    Homemade Potato Chips

    Indulge guilt-free in homemade potato chips crafted from potato peels, a clever and eco-friendly way to minimize food waste. These crispy delights not only offer a delicious snack but also provide surprising health benefits. Potato peels are rich in fiber, vitamins, and minerals, including potassium and vitamin C. By utilizing the entire potato, you're maximizing nutritional value while reducing environmental impact. Enjoy the satisfying crunch of homemade potato chips while embracing sustainability and nourishing your body with wholesome goodness.

    View recipe
    Sauces
    Savoury
    • 2/3 cup gluten free bread crumbs
    • 3 tablespoons cornstarch
    • 2 tablespoons gluten free flour
    • 2-3 teaspoons salt
    • 1 tablespoon celery salt
    • 1 tablespoon onion powder
    • 1 tablespoon paprika
    • 1 teaspoon garlic powder
    • 1/2 teaspoon dried basil
    • 1/2 teaspoon dried oregano
    • 1/2 teaspoon black pepper
    • 1/2 teaspoon dried thyme
    • 2 tablespoon vegetable oil
    1. In a medium sized bowl add all the ingredients minus the oil.
    2. Blend really well with a whisk or spoon. You could also place everything in a container with a lid and shake until mixed really well.
    3. Now add in the oil and blend really well again.
    4. Store your Shake and Bake mix in a glass container with lid. This can be stored in your cupboard and will last up to a year.

    *To coat your tofu, vegetables or food you are using just place some of the mix in a ziplock bag allowing a lot of air in the bag and shake well until coated. If its not enough mix for coating add more in small amounts. If there is some left over mix left in the bag you can freeze this until ready to use again so as not to waste it. It can also be used in your vegan meatloaf mix or homemade vegan hamburger mix.

    A dish with a blend of spices that replicate shake and bake
    Plant-based
    Gluten-free

    Shake and Bake Homemade Blend

    This gluten-free vegan shake and bake recipe provides a delicious and wholesome alternative to traditional breaded coatings. With a blend of gluten-free flours and savory seasonings, it's perfect for coating tofu, vegetables, or plant-based proteins before baking, delivering a crispy texture and satisfying flavor without any animal products or gluten

    View recipe
    Beverages
    Breakfast
    Canning & Preserving
    • 6 cups organic fresh strawberries
    • 6 cups organic cane sugar
    • 4 cups freshly squeezed organic lemon juice
    • place the washed and hulled strawberries in your Vitamix blender and puree
    • add the pureed strawberries to a medium sized sauce pan
    • add the lemon juice and sugar to the puree and turn the heat to medium
    • simmer your mixture stirring occasionally and heat to 190 degrees F, do not boil
    • scoop off the foam, ladle the concentrate into your hot sterilized pint size jar leaving 1/4 inch headspace
    • wipe the rim with a cloth dipped in vinegar, add the seal and ring, tighten to finger tight.
    • place jars in your water bath canner and when canner is full bring the water to a boil and allow to process for 15 minutes
    • turn off the heat and allow the jars to sit in the canner for 5 minutes before removing
    • place jars on your counter undisturbed for 24 hours, wipe jars down, check for seal and store

    You can keep the concentrate in bottles in the fridge to use without canning. Use un-canned concentrate within two weeks.

    To make your Strawberry Lemonade drink add 1 part concentrate to 3 parts water. Add ice cubes, slices of lemon and/or fresh sliced strawberries and enjoy!

    For an even healthier twist use coconut water in place of water or try it with carbonated/sparkling water.

    Canned Strawberry Lemonade Concentrate
    canning jars with strawberry lemonade concentrate
    Plant-based
    Gluten-free

    Strawberry Lemonade Concentrate

    Homemade strawberry lemonade concentrate offers a refreshing and flavorful twist on a classic drink, packed with the natural goodness of strawberries and lemons. It's a healthier alternative to store-bought concentrates, as it typically contains fewer additives and preservatives. Plus, strawberries are rich in vitamin C and antioxidants, while lemons provide vitamin C and aid digestion. Enjoying this homemade treat can be a delicious way to hydrate and boost your intake of essential nutrients.

    View recipe
    Savoury
    Soup
    Canning & Preserving
    • 2 cups nutritional yeast
    • 1/3 cup of sea salt
    • 1/4 cup of onion powder
    • 1/4 cup of garlic powder
    • 1/4 cup of dried basil
    • 1/4 cup of dried rosemary
    • 1/8 cup of dried oregano
    • 2 tablespoons of black pepper
    • In a large jar (big enough to hold 3 cups) add all the above ingredients.
    • Give your jar a good shake to make sure all the ingredients are mixed thoroughly.
    • You can also add all the ingredients to a bowl and whisk well and then pour them into a jar.
    • Cover your jar and place in your cupboard until ready to use.

    To use add 1 tablespoon of vegan bouillon to 1 cup of hot water.

    You can double or triple the above recipe and keep in an airtight glass jar and it will keep for a really long time.

    This recipe is great to use in the make ahead Vegan Ramen Soup in a Jar

    Vegan Gluten Free Ramen Soup in a Jar (with homemade dehydrated vegetables and dry canned)
     a mason jar with homemade vegan and gluten free bouillon powder for making ramen, soups etc
    Plant-based
    Gluten-free

    Vegan Bouillon Powder

    Homemade vegan gluten-free bouillon powder offers a flavorful and versatile seasoning option crafted from wholesome plant-based ingredients. By combining nutritional yeast, herbs, spices, and vegetables, this DIY bouillon provides a rich umami taste without any animal products or gluten, making it suitable for a wide range of dietary preferences and restrictions. Enjoy the convenience and depth of flavor while supporting a cruelty-free and allergen-friendly kitchen.

    View recipe
    Dessert
    • 2 tablespoons vegan margarine
    • 1 1/2 cups chopped pecans
    • 1/2 cup coconut sugar
    • 1/4 cup pure maple syrup
    • 3/4 cup full fat canned coconut milk
    • 2 teaspoons vanilla extract
    • 3 tablespoons cornstarch
    • 1/4 teaspoon fine sea salt
    • 1 9 inch prepared gluten free pie shell
    1. Preheat oven to 350 degrees F.
    2. Partially bake your prepared gluten free pie crust in the heated oven for 7 minutes. Remove from oven and allow to cool.
    3. In a small bowl add the cornstarch and coconut milk and mix well. Set aside.
    4. In a medium sized saucepan melt the vegan margarine over medium heat. Add the pecans and toast in the pan for about 30 seconds while continuously stirring.
    5. Pour in the maple syrup, coconut sugar, coconut milk mixture, vanilla and salt. Whisk until smooth.
    6. Remove from the heat and pour the pecan mixture into the pie crust.
    7. Bake in the oven for approximately 30 minutes, or until the filling appears mostly firm when you gently jiggle it.
    8. Allow the pie to cool on your counter for 2-3 hours and then cover it and place in the refrigerator over night.
    9. Before serving allow your pie to sit at room temperature for about an hour.
    10. Serve with whip cream, ice cream or enjoy as it is!
    Two slices of vegan pecan pie
    Plant-based
    Gluten-free

    Pecan Pie

    A vegan gluten-free pecan pie offers a delicious twist on the classic dessert, suitable for those with dietary restrictions. Pecans, the star ingredient, are not only flavorful but also offer health benefits. Rich in heart-healthy fats, antioxidants, and fiber, pecans support heart health, provide essential nutrients, and may help reduce inflammation, making them a nutritious addition to any diet.

    View recipe
    Canning & Preserving
    Dessert
    Sauces
    • 12 cups fresh or frozen blueberries
    • 1 1/4 cups sugar
    • 8 tablespoons of cornstarch or 1 cup Clear Jel which is a safe thickener for canning, not cornstarch)
    • 1/2 tsp cinnamon (optional)
    • 1 cup cold water
    • 3 cups blueberry or apple juice
    • 1/2 cup lemon juice (bottled for acidity consistency)
    • This blueberry filling can be used right away or stored in the fridge for up to a week. It’s perfect for pies or as a topping for ice cream, yogurt, or pancakes!
    • In a medium saucepan, combine 3 cups of blueberries with sugar, water, and salt. Heat over medium until blueberries release their juice and begin to simmer.
    • In a small bowl, mix the cornstarch with a few tablespoons of cold water to create a slurry. Add this to the blueberries, stirring constantly, until the mixture thickens (about 2-3 minutes).
    • Add the remaining 1 cup of blueberries, lemon juice, and vanilla extract, stirring well.
    • Cook for another minute, then remove from heat. Allow the filling to cool before using.

    To can your Blueberry Pie Filling:

  • Prepare Jars and Equipment: Sterilize jars and prepare lids according to manufacturer's instructions. Fill a large water bath canner with water and bring it to a simmer.
  • Fill Jars: Ladle the hot blueberry filling into hot sterilized jars, leaving 1 inch of headspace at the top. Use a spatula or bubble remover tool to release air bubbles. Wipe the jar rims clean and apply lids and rings until fingertip-tight.
  • Process in Water Bath:

    • Place the filled jars in the water bath canner, ensuring they’re covered by at least 1 inch of water.
    • Process the jars for 30 minutes (adjust time if you are at higher altitudes).
    • After processing, turn off the heat and let jars sit in the canner for 5 minutes. Remove jars carefully and let cool on a towel for 12-24 hours.
  • Check Seals and Store: After cooling, check the seals. If any jars haven’t sealed, store them in the refrigerator and use within a week. Properly sealed jars can be stored in a cool, dark place for up to a year. Make sure to wash your sealed jars in hot soapy water before storing.
  • A bowl filled with homemade blueberry pie filling.
    Plant-based
    Gluten-free

    Blueberry Pie Filling

    Here’s a simple and delicious Blueberry Pie Filling recipe, perfect for pies, tarts, or as a topping for desserts! This homemade filling is fresh, naturally sweetened, and easy to make.

    View recipe
    Savoury

    Pizza Sauce

    • 1 28oz can of diced tomatoes
    • 2 tablespoons of olive oil
    • 1 teaspoon garlic
    • 1 tablespoon oregano
    • 1 teaspoon salt
    • 1 teaspoon basil
    • 1 teaspoon granulated sugar (or more to taste)

    Pizza Dough

    • 2 cups gluten free flour
    • 2 teaspoons Xanthan gum
    • 1 teaspoon baking powder
    • 1 teaspoon salt
    • 3/4 lukewarm warm water
    • 1 teaspoon granulated sugar
    • 9 g active dry yeast
    • 1 tablespoon olive oil

    Pizza Sauce

    1. Place all ingredients in a medium sized bowl.
    2. Using your hand massage the spices into the tomatoes breaking up any pieces.
    3. Set aside for a few minutes to allow flavors to seep into the sauce.
    4. Sauce is ready to use or store in a closed container in the fridge or you can freeze it as well. This does make sauce for about two pizzas.

    Pizza Dough

    1. In a large bowl mix all of the dry ingredients together.
    2. In a smaller bowl mix the wet ingredients together.
    3. Add the wet ingredients to the dry ingredients and mix until you get a sticky dough.
    4. Work the dough either in the bowl the best you can or turn onto a non flour surface to knead until smooth.
    5. Oil the inside of a large bowl and place your dough in the bowl. Cover with saran and place in a warm place for about an hour.
    6. The dough will rise slightly but not double in size.
    7. While the dough is rising prepare your ingredients that you want to put on your pizza.
    8. I slice up mushrooms, green, red and yellow peppers, white onion, spinach and slice tomatoes.

    Assemble Pizza

    1. Preheat your oven to 400 degrees F.
    2. if using a cookie sheet place a piece of parchment paper on it or you can cook it on a pizza stone.
    3. Spread the dough to the size and thickness you like, creating an edge around the pizza.
    4. Spread some olive oil on the dough and assemble the veggies as you wish and sprinkle some vegan cheese if you wish.
    5. Bake in the preheated oven for 16-20 minutes or until the bottom of the crust is golden.
    6. Remove from oven and enjoy!
    A vegan gluten free pizza made with lots of vegetables homemade pizza dough and homemade pizza sauce.
    Plant-based
    Gluten-free

    Homemade Pizza

    The best authentic gluten-free and vegan pizza is a flavorful and versatile option crafted with high-quality, plant-based ingredients. An easy to create dough with a sauce that consists of ripe tomatoes and spices, blended to perfection to achieve a rich consistency.

    View recipe
    Breakfast
    Dessert
    • 1 cup raw almonds
    • 1 cup walnuts
    • 1 cup dry dates soaked in hot water for 15 minutes, then drain
    • 6 Medjool dates pitted
    • 1/4 tsp vanilla
    • 1 cup shredded coconut
    1. Place the almonds and walnuts in your high powered blender container (I prefer my Vitamix) and secure the lid.
    2. Select variable 6 and pulse 8 times.
    3. Remove the lid and add in the wet dates, pitted dates, vanilla and coconut.
    4. Replace the lid but remove the lid plug. Insert the tamper.
    5. Select variable 6 and pulse 35 - 40 times, using the tamper to press the ingredients into the blades.
    6. Once the mixture looks wet and begins to cake, the mixture is done.
    7. Roll mixture from the container into 1/2 ounce (15g) balls and chill before serving.
    8. Store in airtight container.
    9. Enjoy!
    Healthy Energy Balls
    Plant-based
    Gluten-free

    Nut and Date Energy Balls

    These little power balls are loaded with both protein and flavor. Perfect as a healthy grab and go breakfast or snack.

    View recipe
    Savoury
    • a medium-sized nappa/Chinese cabbage (about 2 lbs)
    • 2-3 blemish free medium sized carrots, peeled and cut into juliennes (about 300 g)
    • about ¼ to ⅓ of a daikon root, also cut into juliennes (about 300g)
    • ½ cup of green onions (about 4-5 green onions) green and white parts, thinly sliced (about 50g)
    • Pink Himalayan salt: 1.5% of the total weight of the total above vegetables. Use a kitchen weight scale to measure the right quantity.
    • ¼ cup of Gochugaru Korean pepper
    • about two to three inches (5-7 cm) of peeled fresh ginger root  
    • a full head of garlic (cloves only and peeled)
    • a small apple or 1/2 Asian pear, seeded
    • to taste, dried seaweed flakes (nori, seaweed, wakame)

    1. Remove the outer leaves from the cabbage and clean them. Set aside for later which will be used to keep kimchi below liquids in jar.
    2. Roughly cut the cabbage: cut in half lengthwise, then cut in half again, remove the core and roughly chop the cabbage into pieces of about 3-4 cm big (bite size).
    3. In a large bowl, combine the cabbage, the julienned carrots & daikon and the green onions. Weigh the contents of the bowl and do the calculation to know the amount of salt that is required for use. It should be 1.5% of the total weight of the vegetables.
    4. Sprinkle the salt over the vegetables and massage them until they slowly start to release their water, (this will act as natural brine). Set the bowl aside.
    5. Make the chili paste: in a small food processor or blender, purée together the chili pepper, fresh ginger, garlic cloves, apple (or Asian pear) and the seaweed flakes.
    6. Add the chili paste to the bowl of vegetables and mix well with your hands or gloved hands. Check to see if some liquid from the veggies is on the bottom of the bowl. If there’s no liquid or not enough of it, let the kimchi sit for an extra 30 minutes, massaging from time to time.
    7. Using a wide mouth funnel, fill the jar with the kimchi. With a wooden spoon or directly with your hands, press the kimchi to make sure to eliminate as many air bubbles you can, but also to cover the kimchi with its own brine. Caution: do not over fill the jar or it might overflow during the first 24-48 hours. Try to keep it bellow 3/4 full.
    8. Use the outer leaves of the cabbage that were set aside, to cover the kimchi. They will create a barrier in order to keep kimchi below the brine, but will also protect against certain kinds of mold which could be likely to spread on its surface. You can simply throw those leaves away once the fermentation process is done.
    9. Make sure to use enough cabbage leaves to keep the kimchi well submerged below brine. Close the kimchi jar. Store it in a place away from direct light and sufficiently ventilated. Leave it there to ferment for 3 to 14 days, depending of the temperature of the room and your own taste. *Make sure to burp your jar daily by opening the jar to let the pressure (CO2) out and check that the kimchi is still well submerged by its own brine. If necessary, use a clean wooden spoon, NOT METAL to push the kimchi down and eliminate potential air bubbles). During the fermentation process, the kimchi will become more tangy and almost sparkling to taste.
    10. Stop the fermentation process when you are satisfied with the taste just making sure NOT to use the same utensil if taking more than one bite. In the hot summer it can be ready in as little as 48 or 72 hours. During the colder season, it can take more than a week.
    11. Once fermented, store your kimchi in the refrigerator. In the fridge your kimchi can be kept for several months. Making sure it doesn’t ran out of brine and it stays well submerged. Always use a clean utensil to remove kimchi and never double dip.

    Kimchi is a versatile and flavorful dish that can be used in a variety of ways. It can be used alongside rice or main courses, made into kimchi rice, kimchi pancakes, kimchi stew, added to noodles, burgers, tacos, wraps, quesadillas, salads, sushi rolls, mayo, sauces and even grilled cheese.

    These are just a few ideas, and the possibilities are nearly endless. Kimchi's bold and complex flavors make it a versatile ingredient that can enhance a wide range of dishes, adding a unique and savory kick.

    Kimchi Rice ~ recipe on found on this website


    three jars of homemade vegan and gluten free kimchi
    Plant-based
    Gluten-free

    Kimchi

    Vegan kimchi, a fermented dish typically made with vegetables like cabbage and radishes, offers a range of health benefits like probiotics for gut health, its high in antioxidants, low in calories and rich in nutrients.

    View recipe
    Sauces
    • 1 teaspoon Italian Seasoning
    • 2 tablespoon vegan margarine
    • 3 teaspoons minced garlic
    • 8 oz mushrooms, sliced
    • 1/2 cup vegetable broth
    • 1 cup non dairy heavy cream
    • 1 teaspoon dijon mustard
    • 1/2 teaspoon salt
    • 1/4 teaspoon cracked black pepper
    • 2-3 tablespoons vegan parmesan cheese (optional)
    1. In a large cast iron skillet over medium high heat add the butter and allow to melt.
    2. Once melted add in the garlic and mushrooms and sauté 2-3 minutes until mushrooms are browned and garlic is fragrant.
    3. Stir in the vegetable or vegan chicken broth, heavy cream, Dijon mustard, salt and pepper and bring to a boil.
    4. Cook for two minutes and them remove from heat.
    5. If usingvegan parmesan cheese stir it into the sauce now.
    6. Serve with your favorite gluten free pasta, over cooked tofu or vegetables of choice.
    a skillet with creamy mushroom sauce for pasta, vegetables and tofu
    Plant-based
    Gluten-free

    Creamy Mushroom Sauce

    Indulge in the creamy goodness of vegan gluten-free mushroom sauce, a delectable and nutritious addition to your meals. Made with plant-based ingredients like mushrooms, dairy-free milk or cream, garlic, and herbs, this sauce offers a rich and savory flavor profile without the use of animal products or gluten. Mushrooms are packed with essential nutrients such as vitamins, minerals, and antioxidants, supporting immune health, heart health, and overall well-being. Incorporate this creamy mushroom sauce into pasta dishes, roasted vegetables, or grain bowls for a deliciously satisfying and wholesome culinary experience that caters to diverse dietary needs.

    View recipe
    Breakfast
    Dessert
    • 6 cups thinly sliced apples
    • 1 tablespoon lemon juice
    • 1 cup brown sugar
    • 1 cup gluten free four
    • 1 teaspoon xanthan gum (if flour doesn't have it)
    • 1 teaspoon cinnamon
    • 1/2 cold vegan margarine
    1. Preheat oven to 350 degrees F.
    2. Arrange sliced apples in bottom of glass baking dish (6"x10").
    3. Sprinkle apples with lemon juice.
    4. In a medium size bowl combine sugar with flour, spices and margarine.
    5. Rub through your fingers until its the consistency of peas. Add more flour a little at a time if needed.
    6. Spread the flour mixture over the apple slices and press down with light to medium pressure.
    7. Bake just above center in oven for 30 minutes.

    *Serve warm with non dairy milk, non dairy whip topping or non dairy ice cream.

    A dish of apple crisp pudding and a baking dish behind it with the apple crisp pudding
    Plant-based
    Gluten-free

    Apple Crisp Pudding

    Vegan gluten-free apple crisp pudding, without oats, offers a nutritious dessert option rich in fiber from apples, along with vitamins, minerals, and antioxidants. It's free from animal products and gluten, catering to dietary preferences and restrictionFor years, this pudding has remained a beloved favorite in our family. Its appeal surpasses that of traditional apple crisp with oats, making it our top choice every time.s.

    View recipe
    Beverages
    Canning & Preserving
    Breakfast
    • 24 cups water
    • 24 tea bags
    • 5 cups of organic cane sugar
    • 6 quart jars (hold 4 cups)
    • Fill a large pot with 24 cups of water and bring to a simmer
    • Add the 24 tea bags and allow to simmer for 20 minutes more
    • While it is simmering add 1 1/4 cups of sugar to 6 quart jars
    • Once the 20 minutes is up remove the tea bags and add the tea to the jars and stir well.
    • Wipe each jar with a small amount of vinegar on a cloth and add the lid and ring and tighten to finger tight.
    • Place your jars into the water bath canner and cover with water. Make sure you have 2 inches of water covering the tops of the jars.
    • Bring the water to a rolling boil and start your timer for 10 minutes.
    • When 10 minutes is up, turn off the heat and allow them to sit in the canner for 5 minutes.
    • Now remove your jars carefully by using a canning jar lifter and set them on a towel. You should hear them “pop” and seal.
    • or you can also process your jars for 10 minutes in your pressure canner.
    • Allow the jars to sit on the counter undisturbed overnight.
    • After 24 hours check the seals and store until your ready to use it.

    To make the sweet tea, add 1 quart jar to 3 quart jars of water, total will equal 16 cups of sweet tea.

    You can add freshly squeezed lemon juice or slices to your tea if you wish.

    Enjoy your sweet tea!

    a glass of homemade sweet tea made from canned sweet tea concentrate
    Plant-based
    Gluten-free

    Sweet Tea Recipe - Concentrated and Canned

    Homemade sweet tea concentrate offers a refreshing and customizable beverage option with potential health benefits. Rich in antioxidants from tea leaves, it may support heart health, boost metabolism, and provide a natural energy lift. By controlling sugar content, you can tailor sweetness to your preference, reducing overall calorie intake compared to store-bought versions.

    View recipe
    Sauces
    Savoury
    • 2 1/2 cups bread flour
    • 1 teaspoon instant yeast
    • 1 1/2 teaspoons salt
    • 2 tablespoons olive oil
    • 1 cup plus 2 tablespoons water
    1. In a large bowl mix all the dry ingredients together.
    2. In a smaller bowl mix the wet ingredients together.
    3. Add the wet ingredients to the dry ingredients and mix until you get a sticky dough.
    4. Work the dough either in the bowl the best you can or turn it onto a non flour surface to knead until smooth.
    5. Oil the inside of a large bowl and place your dough in the bowl. Cover with saran and place in a warm place for about an hour.
    6. If your using the dough now this is when its a good time to prepare your ingredients you will place on your pizza. Otherwise it can be stored in the refrigerator for a couple days or it can be frozen.
    7. The dough will rise slightly but not double in size.
    8. Preheat your oven to 400 degrees F.
    9. If using a cookie sheet place a piece of parchment on it or you can cook your pizza on a pizza stone.
    10. Spread your dough to the size of the thickness you like, creating an edge around the pizza.
    11. Spread some olive oil on the pizza dough, homemade pizza sauce and assemble with your ingredients.
    12. Bake in the preheated oven for 16 - 20 minutes or until the bottom of the crust is golden.
    13. Remove from oven and enjoy!
    Homemade Pizza with Greek Pizza Dough
    homemade greek pizza dough
    Plant-based
    Gluten-free

    Greek Pizza Dough

    Homemade Greek pizza dough is a simple yet satisfying recipe that combines flour, water, yeast, olive oil, and salt. It's easy to prepare and results in a chewy, flavorful crust that pairs perfectly with toppings like tomato sauce, roasted vegetables, olives, and fresh herbs.

    View recipe
    Breakfast
    Dessert
    Canning & Preserving
    • organic just ripe bananas
    • 1 tablespoon of lemon juice for every 4 cups mashed bananas
    • Peel your bananas and set peels aside for another project.
    • Place the banana in a medium sized pot. (it may be easier to mash bananas in a bowl and use measure scoop to gage how much you have to add the lemon juice)
    • Mash the bananas and add lemon juice and stir well.
    • Turn heat to medium high and heat your banana mixture to an almost boil.
    • Add your hot banana mixture to hot sterilized jars, leaving 1/2 inch at top of jar.
    • Remove any air bubbles by running a chopstick along the inside of the jar.
    • Wipe the rim of each jar with vinegar on a cloth and place your seal on top and add the ring only to finger tight.
    • Place your hot jars into your hot water bath canner and bring your water to a boil and allow to boil for 10 mins for 250 ml jars. Make sure each jar is covered by 1 - 2" of water.
    • After the time is up turn off the heat and allow the jars to sit in the canner for 5minutes and then remove the jars from water, do not tilt the jars.
    • Allow them to sit on the counter undisturbed for 24 hours. After 24 hours check that each jar has sealed, remove the rings and wipe down each jar, label and place your sealed jars in your storage for later use. Use within one year.
    • Any unsealed jars can be placed in your fridge and consumed within one week.

    To use the banana peels:

    • Place the banana peels in a bowl with water and allow to sit for 24 hours to allow the nutrients from the bananas to seep into the water. Remove the peels and compost and use the banana water to water your indoor plants.
    • You can also dehydrate the peels and grin them up in a coffee grinder to use as a fertilizer for plants and gardens.
    • The peels can be pureed and added to baked goods, boiled to make tea, sliced into fruit smoothies, or chopped and added to savory dishes for a sweet addition.
    Banana peels have many uses ~ dont just throw them away!
    jars of freshly canned bananas
    Plant-based
    Gluten-free

    Canned Bananas

    Canning bananas is a great way to preserve their freshness and enjoy them throughout the year. Whether you're making banana jam, preserves, or even pickled bananas, canned bananas can add a flavorful twist to your recipes. Just ensure you follow proper canning procedures to maintain safety and quality.

    View recipe
    Beverages
    • 54 oz coconut milk from a can
    • 18 oz coconut water
    • 18 oz Grand Marnier (or use orange juice if making a virgin cocktail)
    • 27 oz tequila (omit if making it virgin)
    • 1 1/2 cup lime juice
    • 9 tablespoons Agave nectar
    • garnish: fresh cranberries, lime slices, rosemary sprigs, 1/3 sugar on a plate for rimming your glass
    1. In a large serving pitcher add coconut milk, coconut water, grand marnier (or orange juice), tequila, lime juice and agave.
    2. Stir really well until combined and coconut milk no longer separates.
    3. Rub a slice of lime along the rim of glass and then dip glass into sugar.
    4. Place ice in the glass.
    5. Carefully pour your White Margarita mix into the glass without touching your sugared rim.
    6. Top drink with fresh cranberries, a slice of lime and a rosemary sprig.
    7. Enjoy!
    Wine glasses filled with white margarita and topped with cranberries, lime slice and a rosemary sprig.
    Plant-based
    Gluten-free

    White Margarita

    Transport your taste buds to a tropical paradise with our White Margarita, a refreshing and sophisticated twist on the classic cocktail. This enchanting libation is a marriage of premium ingredients that come together to create a drink that's both visually stunning and delightfully flavorful.

    View recipe
    Beverages
    • 8 cups filtered water
    • 2/3 cup organic sugar or unrefined sugar
    • 4-6 inch piece of organic fresh ginger root thinly sliced
    • 1/2 cup ginger bug starter
    • 1/3 cup lime juice or lemon juice (optional)
    1. Place the water, sliced ginger root and sugar in a pot and bring this to a boil.
    2. Reduce the heat to low/medium and simmer for 5 minutes, then remove it from the heat, set aside and allow the tea to cool to room temperature.
    3. Place a fine mesh strainer over a bowl and pour the mixture into it to separate the ginger from the liquid.
    4. Add the ginger bug starter and lime/lemon juice (if using) to the liquid and mix with a wooden spoon.
    5. Pour the liquid into flip top bottles (leaving one inch head space ) and ferment 3-6 days on your counter. During this fermentation process "burp" the bottles by opening them every 1-2 days so the carbonation doesn't build up to much.
    6. Your ginger ale is ready when it is fizzy and not overly sweet. If you check it after a week and its still too sweet let it ferment for a bit longer.

    *Do not use chlorinated or softened water it will kill the fermentation process.

    *Make sure the simmered ginger tea is at room temperature because if you add the ginger bug too hot tea it will kill the beneficial yeast and bacteria needed for fermentation.

    *Make sure to burp the bottles every 1-2 days as some people have reported that their bottles exploded because they let them ferment for way to long without burping them. This is also why its important to use good flip top bottles.

    Flip Top Lid Bottle

    a glass full of homemade ginger ale using a homemade ginger bug starter
    Plant-based
    Gluten-free

    Ginger Beer made with a Ginger Bug

    Homemade ginger beer made with homemade ginger bug offers numerous health benefits. Packed with probiotics from the fermentation process, it supports digestive health, enhances the gut microbiome, and potentially boosts immune function. Additionally, the natural ingredients, like fresh ginger, contribute anti-inflammatory and antioxidant properties, making it a refreshing and healthful beverage choice.

    View recipe
    Soup
    • 4 tablespoons vegan margarine
    • 1 tablespoon olive oil
    • 2 white onions diced
    • 4 cloves garlic, minced
    • 1 1/2 pounds (750grams) fresh mushrooms, sliced
    • 2 teaspoons chopped thyme
    • 1/4 cup red wine vinegar
    • 1/4 cup water
    • 6 tablespoons gluten free flour
    • 4 cups vegan chicken stock or vegetable stock
    • 1 - 2 teaspoons Himalayan salt
    • 1/2 - 1 teaspoons black pepper
    • 2 vegan beef bouillon cubes crushed
    • 1 cup heavy dairy free cream or half and half
    • chopped fresh parsley for serving
    1. In a large pot over medium-high temperature, heat the vegan margarine and oil until the margarine is melted.
    2. Add in the onions and sauté until the onions are translucent for about 2-3 minutes and then add the garlic and cook for about 1 minute.  
    3. Add your sliced mushrooms to the pot along with the chopped thyme.
    4. Cook for approximately 5 minutes.
    5. Now add in the 1/4 cup red wine vinegar and the 1/4 cup water, stir well and cook for another 3 minutes.
    6. Sprinkle the gluten free flour over the mushrooms and wine mixture, stir well and cook for 2 minutes.
    7. Add the vegan chicken stock and bring to a boil. Once it reaches boil point reduce the heat to low-medium.
    8. Season with salt, pepper and the crushed vegan beef bouillon cubes. Stir well.
    9. Cover and allow to simmer for 10 - 15 minutes, stirring occasionally until it reaches a thickness you like.
    10. Turn the temperature to low heat and stir in the non dairy cream and heat through. Do not allow it to boil.
    11. Once its heated through turn off the heat.
    12. Serve hot with some sprinkled parsley. Enjoy!
    Fresh Button Mushrooms
    A bowl full of homemade healthy cream of mushroom soup
    Plant-based
    Gluten-free

    Cream of Mushroom Soup

    Healthy homemade mushroom soup, vegan and gluten-free, offers a nutritious and comforting option for those with dietary restrictions. Made with wholesome ingredients like mushrooms, onions, and vegetable broth, it provides a rich source of vitamins, minerals, and antioxidants. They're particularly notable for their potential to support immune function, heart health, and cognitive function. Additionally, mushrooms are a good source of protein and dietary fiber, making them a valuable addition to a balanced diet.This satisfying soup is flavorful, easy to prepare, and perfect for warming up on chilly days while catering to diverse dietary needs.

    View recipe
    Breakfast
    Canning & Preserving
    Dessert
    Sauces
    • 12 apples
    • 2 cups brown sugar
    • 2 teaspoons ground cinnamon
    • 1/2 teaspoons ground allspice
    • 1/4 teaspoon salt
    • 1/4 teaspoon ground cloves
    • 7 pint jars
    • Wash, peel, core and dice apples into small cubes. (keep your peels to make homemade apple cider vinegar)
    • In a slow cooker combine apples, brown sugar, cinnamon, allspice salt and cloves.
    • Cook on high until the apples are tender enough to mash, this can take 4 or more hours.
    • When they are mashed combine the mixture really well and use an immersion blender to puree until smooth.
    • Place in hot sterilized pint jars leaving 1/4 headspace. Debubble the jars using a chopstick or knife ran down the inside of the jar. Add more product if needed.
    • Wipe the rims with a cloth dipped in vinegar and place on your seal/lid and tighten the ring to finger tight.
    • Place your jars in your water bath canner and process for 10 minutes. Making sure water is 2" above the jars while processing. Shut off heat and allow the jars to sit for 5 minutes in the water before removing.
    • Place jars in a location where they will not be disturbed for 24 hours.
    • After 24 hours check the seal and wash the jars in hot soapy water, label the jars and place in storage.

    Process* allow the water to come to a rolling boil and allow to boil for the amount of time suggested.

    Save your Apple peels and cores to make Homemade Apple Cider Vinegar
    A plate with a bowl of homemade apple butter and slices of apples.
    Plant-based
    Gluten-free

    Apple Butter

    Homemade apple butter is a delicious way to enjoy the flavors of fall, made with simple ingredients like apples, spices, and a touch of sweetness. It's easy to make at home, free from preservatives, and perfect for spreading on toast, mixing into oatmeal, or using in baking. Plus, it fills your kitchen with the cozy aroma of spiced apples!

    View recipe
    Breakfast
    Dessert
    Sauces
    • 1 14 ounce can full fat organic coconut milk
    • 3 capsules of 30 Billion probiotics
    • shake the can of coconut milk really well to combine the liquid and the solids of the milk
    • open the can and pour into a clean bowl or jar (if it still isn't smooth you can use a whisk to blend it well)
    • open the capsules of the probiotics and pour the probiotic granules into the coconut milk
    • using a wooden spoon combine the probiotic granules and the coconut milk really well (do not use a metal spoon as the metal with kill the probiotics)
    • cover your bowl with cheesecloth, paper towel or a clean towel that will allow it to breathe and secure it in place with elastic to not allow any flies to enter
    • place the bowl in an undisturbed area at room temperature for 24 - 48 hours or until it reaches the tanginess that you prefer
    • store your finished yogurt in the fridge in a clean container with a lid
    • you can add agave or honey for sweetness and you can also add flavorings like vanilla or vanilla bean powder
    • enjoy your yogurt with a variety of fruits, homemade granola or just as it is.
    Homemade Vegan Yogurt with added fruit and homemade granola
    a bowl of homemade vegan yogurt
    Plant-based
    Gluten-free

    Vegan Yogurt - Only 2 Ingredients

    Homemade vegan yogurt, made from coconut milk, is rich in probiotics that aid digestion and support gut health. It's also lactose-free, lower in calories and fat, and free from cholesterol, making it a heart-healthy option.

    View recipe
    Beverages
    Fermentation
    • apple scraps like peels and cores (organic is best)
    • filtered water
    • cane sugar
    1. In a large clean glass jar place all your clean apple scraps. Whatever the size of the jar it should be filled to half with your scraps.
    2. The remainder of the container should be filled up with room temperature filtered water, making sure to use a measuring cup to track the amount of water you use.
    3. Now add 1 tablespoon of cane sugar for every cup of water you added to the jar. ex: 6 cups water = 6 tablespoons cane sugar
    4. Stir your mixture really well with a clean wooden spoon until all the sugar has dissolved.
    5. To kick start your batch you can add a few tablespoons of finished apple cider vinegar. This step isn't necessary but it can help prevent the formation of mold.
    6. Now cover your apple cider vinegar with a clean breathable material, such as a lint free tea towel, old pillow case or even coffee filter. I find the reusable bamboo paper towels work well. Tie or use an elastic to keep the cloth in place and any fruit flies out. Do not use cheese cloth as fruit flies can enter through the cloth.
    7. Now place your apple cider vinegar in a dark warm location that is around 70 - 75 degrees F, if possible.

    1. For the first two weeks you will need to stir the mixture well with a clean wooden spoon. This helps to prevent mold.
    2. During this time you will notice the apples will turn brown and the liquid will become cloudy. Small bubbles should appear and will begin to smell like hard apple cider. A layer of yellowish-white settlement may settle on the bottom of the jar. This is all normal and good.
    3. If any fuzzy, green or white raised mold on the surface is not good, but this rarely happens.
    4. After two weeks of stirring it is time to strain your ACV.
    5. Use a fine mesh strainer and strain into a clean large bowel. Now you can compost the apple scraps.
    6. Pour the ACV vinegar liquid into a clean glass container and cover as you did before.
    7. Continue to ferment.
    8. Store again in a dark warm area for at least a month or longer. The bacteria will continue to convert the sugar to alcohol to acetic acid, creating vinegar.
    9. After a month has passed give it a taste test. If it tastes plenty vinegary for your liking you can move to the next step. If not allow to ferment longer.
    10. When in doubt you can use these simple PH test strips. Finished ACV should have a PH of 2-3.
    11. Once it reaches the perfect fermentation level transfer the apple cider vinegar into bottles with tight fitting lids for storage. You can use old acv bottles or store it in swing top kombucha bottles.
    12. As an acidic concoction, homemade apple cider vinegar does not have to be refrigerated for safety-sake. It is best to be stored in a relatively cool, dark place.
    13. If you decide to refrigerate it the bacteria activity will slow down and prevent the vinegar from fermenting beyond this point.
    14. Most people enjoy their ACV cold but even stored at room temperature, homemade ACV will stay good for up to five years. The quality and flavor will best though within the first two years.

    *Wash your jar in hot soapy water and rinse well, then clean it with vinegar.

    *Never use a metal spoon as the metal can react and kill your fermentation.

    *From beginning to finish your ACV can take from 2 - 3 months before bottling.

    *Sometimes a Scoby layer can develop on top of your liquid, a layer of Scoby is a thin smooth off white membrane made up of accumulated beneficial bacteria and yeast. It is normal and harmless. You can just discard it when you are ready to bottle your ACV.

    A jar filled with leftover apple scraps to make homemade apple cider vinegar.
    Plant-based
    Gluten-free

    Apple Cider Vinegar - Homemade

    Apple cider vinegar (ACV) may offer health benefits such as aiding digestion, regulating blood sugar levels, promoting weight management, and possessing antimicrobial properties, although its effects can vary among individuals. It is very easy to make at home and can be used in recipes like salad dressing, baking, fire cider and even taken as a health shot.

    View recipe
    Savoury
    Soup
    • 1 medium white onion sliced
    • olive oil
    • 680 ml can of spaghetti sauce of your choice ( I prefer Bravo)
    • 796 ml can of diced tomatoes
    • 540 ml can red kidney beans, drained
    • 398 ml can of navy beans in tomato sauce, do not drain
    • salt and pepper to taste
    • 24 gram pkg of Old El Paso Chili Seasoning Mix (this makes the best chili) or use spice mix of choice
    • 2 cups cooked quinoa
    1. Cook quinoa according to directions.
    2. On medium high temp heat a medium sized pot and add oil. Add onions and cook until translucent.
    3. Pour in your tomatoes, spaghetti sauce, kidney beans and navy beans.
    4. Stir well and heat through.
    5. Add in your package of chili seasoning and mix well.
    6. To serve place some cooked quinoa in bottom a serving bowl and top with Chili.
    7. You can also serve chili with sliced avocado, vegan sour cream and shredded vegan cheese or with my Cornbread. See below.
    8. Enjoy!
    Cornbread ~ recipe found on this website
    A bowl of vegan chili with vegetables and quinoa
    Plant-based
    Gluten-free

    Vegan Chili with Quinoa

    Make my quick and easy to Chili that doesn't require all day cooking. Warm your soul and tantalize your taste buds with this Vegan Chili with Quinoa – a hearty, nutritious, and flavor-packed dish that proves plant-based eating can be incredibly satisfying. Bursting with a colorful array of vegetables, protein-rich quinoa, and a harmonious blend of spices, this chili is a celebration of wholesome ingredients.

    View recipe
    Canning & Preserving
    Dessert
    • 6 pounds of apples
    • 1 cup cornstarch
    • 4 1/2 cups white sugar
    • 2 teaspoons cinnamon
    • 1/4 teaspoon nutmeg
    • 10 cups water
    • 2 teaspoons salt
    • 3 tablespoons lemon juice
    • Wash your apples well and then peel and core them. (set the peels and cores aside to make apple cider vinegar)
    • Slice your apples and set aside in a large bowl.
    • In a large saucepan mix together, sugar, cornstarch, cinnamon and nutmeg.
    • Add the water, salt and mix well. Bring this to a boil.
    • Allow this to cook until its thick and bubbly.
    • Remove from heat and add the lemon juice.
    • Pack your hot sterilized jars with sliced apples and pour your hot sugar mixture over top leaving 1/2" headspace.
    • Remove any air bubbles using a chopstick down the insides of the jar.
    • Wipe the rim of each jar with vinegar on a cloth and place your canning seal on top of the jar and add the ring only to finger tight.
    • Place your hot jars into your hot water bath and bring your water to a boil and allow to boil for 20 mins for 500 ml jars.
    • Make sure each jar is covered by 1 -2 inches of water.
    • After the time is up turn off the heat and allow to sit for 5 minutes in the water bath canner and then remove the jars from water, do not tilt the jars.
    • Allow them to sit on the counter undisturbed for 24 hours. After 24 hours check that each jar has sealed, wipe down each jar with hot soapy water, label and place in your storage for later use. Use within one year. Any unsealed jar can be placed in your refrigerator and consumed within a couple weeks.

    *your apple pie filling can be used to make a pie, use in cakes, strudel, breads and muffins.

    *don't forget to make Apple Cider Vinegar with your peels, its very simple and so beneficial.

    Apple Pie
    jars lined with homemade canned apple pie filling
    Plant-based
    Gluten-free

    Apple Pie Filling

    Making homemade apple pie filling offers several health benefits compared to store-bought versions. By using fresh apples and controlling the ingredients, you can reduce added sugars, preservatives, and artificial additives, making the filling a healthier choice. Additionally, homemade apple pie filling allows you to customize the sweetness and spice levels according to your preferences, ensuring a delicious and nutritious dessert that supports overall well-being.

    View recipe
    Savoury
    • 1 cup uncooked quinoa
    • 1 medium tomato, chopped
    • 3/4 red onion, chopped
    • 1 medium cucumber, chopped
    • 1 cup of chopped kale
    • 1 medium red pepper, chopped
    • 1 can chick peas, drained
    • 1 avocado, chopped, optional
    • 2 green onion, chopped, optional
    • 1 can beans of choice, optional
    • 1 block tofu diced and cooked, optional

    Dressing

    • 1/4 cup light tasting olive oil
    • 1/4 cup lemon juice
    • 1 tablespoon red wine vinegar
    • 2 cloves garlic minced
    • 1/2 teaspoon salt
    • pepper to taste

    1. Cook quinoa according to directions and set aside, allowing it to cool.
    2. Prepare the remaining ingredients by cutting up the vegetables and place them in a medium bowl. If you are using chick peas (reserve the liquid *aquafaba for later use), rinse the peas, drain and rinse beans if adding to the salad.
    3. Make the dressing.
    4. In a small bowl add the dressing ingredients and mix well, set aside.
    5. When quinoa is cool add it the medium sized bowl with the vegetables and pour the dressing over and combine well. Or you mix the dressing with the quinoa and arrange your vegetables around the quinoa in a serving bowl.
    6. Keep your Quinoa salad in the fridge in a sealed container. This will keep for a few days.

    *This makes a complete meal, side dish or as a healthy snack. For the vegetables you can add or take away any as you like, add tofu, beans and or chickpeas as you like as well. This dish is very versatile to create as you wish.

    *Aquafaba is the liquid in a can of chick peas. This can be used as an excellent egg replacer in most vegan baking. Freeze your aquafaba in an ice cube tray then remove and place in a freezer bag. One cube replaces one egg. Allow to thaw before using.

    A bowlful of nourishing quinoa as a salad with an abundance of different healthy benefiting vegetables, tofu and beans.
    Plant-based
    Gluten-free

    Quinoa Salad

    Our Vegan Quinoa Salad is a delightful fusion of wholesome ingredients, bursting with flavor and nutrition. Crafted with vibrant vegetables, protein-rich quinoa, and a zesty dressing, this salad offers a satisfying and nourishing meal for vegans and non-vegans alike. Quinoa offers a plethora of health benefits as a versatile and nutrient-rich grain alternative. Packed with protein, fiber, vitamins, and minerals, quinoa supports overall health and wellbeing. It's a complete protein source, containing all nine essential amino acids, making it particularly beneficial for vegetarians and vegans. Additionally, quinoa is gluten-free, making it suitable for individuals with gluten sensitivities or celiac disease. With its impressive nutritional profile, quinoa promotes heart health, aids in digestion, supports muscle repair and growth, and helps maintain stable blood sugar levels. Incorporating quinoa into your diet can contribute to a balanced and nourishing lifestyle.

    View recipe
    Dessert

    • 2 tablespoons aquafaba
    • 3 teaspoons egg replacer by paneriso
    • 1/3 cup melted coconut oil
    • 1/4 cup maple syrup
    • 1/2 cup packed brown sugar
    • 1/4 cup coconut sugar
    • 3/4 teaspoons sea salt
    • 1 1/2 teaspoons baking soda
    • 2 1/2 teaspoons baking powder
    • 1 teaspoon cinnamon
    • 1 cup unsweetened dairy free milk
    • 2 cups loosely packed shredded carrots
    • 1 1/2 cups gluten free flour blend
    • 1 1/2 cups almond meal
    • 3/4 cups chopped walnuts (optional)

    1. Preheat oven to 350 degrees F.
    2. Grease and flour two 8 inch round cake pans with coconut oil and dust with gluten free flour. Set aside.
    3. In a large bowl or stand mixer, mix the aquafaba, egg replacer and maple syrup together.
    4. Next add sugars, salt, baking soda, baking powder, and cinnamon and mix well.
    5. Add in the dairy free milk and combine.
    6. Add grated carrot, gluten free flour mix, almond meal and mix well with stand mixer or using a hand electric mixer.
    7. Add walnuts if using and stir.
    8. Divide evenly among the two cake pans.
    9. Bake for 40 - 50 minutes or until golden brown and a toothpick inserted in the center comes out clean.
    10. Remove the cakes from the oven and allow to rest in the pans for 15 mins.
    11. Carefully run a knife along the edges and gently invert cakes onto cooling racks to let cool completely.
    12. Once cool you can serve as it is or frost with Vegan Buttercream Frosting, or Vegan Cream Cheese Icing creating a two layer cake or two single cakes.
    13. Enjoy!
    Buttercream Frosting
    a plate with a piece of gluten free vegan carrot cake
    Plant-based
    Gluten-free

    One Bowl Carrot Cake

    Delight in the wholesome goodness of a healthy vegan gluten-free carrot cake, a guilt-free indulgence packed with flavor and nutrition. Made with nutritious ingredients like carrots, almond flour, and coconut oil, this moist and satisfying dessert offers a delicious alternative to traditional carrot cake. Carrots are rich in beta-carotene, antioxidants, and dietary fiber, promoting eye health, immune function, and digestion. By opting for a vegan and gluten-free version, you're also supporting dietary preferences and accommodating food sensitivities. Indulge in the delectable sweetness of vegan gluten-free carrot cake while nourishing your body with wholesome ingredients and enjoying its numerous health benefits.

    View recipe
    Breakfast
    Dessert
    • 2 cups uncooked sticky rice
    • 1 14 oz can of coconut milk
    • 1/2 cup granulated sugar
    • 1 teaspoon of vanilla
    • 20 oz diced frozen mango
    1. Place the mango in a bowl and allow it to thaw at room temperature.
    2. Next cook your rice in your rice cooker according to the directions.
    3. While the rice is cooking pour the coconut milk in a medium sized saucepan and bring it to a simmer, stirring constantly.
    4. Add the sugar, salt and vanilla and stir until sugar dissolves.
    5. Remove the pan from the stove and measure out 1 cup of the coconut milk sauce and set it aside.
    6. Place the remainder of the sauce in the fridge until ready to use.
    7. When the rice is finished cooking place it in a medium sized bowl and pour the 1 cup of reserved coconut milk over it and stir until combined.
    8. Let the coconut rice sit for 15 minutes to 3 hours before serving. You can keep it at room temperature or place in the fridge.
    9. To serve, scoop some of the coconut rice into a bowl, pour some of the refrigerated coconut milk over the rice and then top it with some mango. Enjoy!

    *Mango's can be replaced by a variety of different fruits.

    A flavorful desert of coconut flavored rice topped with mango
    Plant-based
    Gluten-free

    Mango with Coconut Rice

    Mango with coconut rice dessert is a delightful treat that combines the sweet and juicy flavor of mangoes with the creamy richness of coconut-infused rice. Mangoes offer numerous health benefits, including boosting the immune system, supporting digestive health, promoting skin health, and providing essential vitamins and minerals such as vitamin C, vitamin A, and potassium. Rich in antioxidants, mangoes may also help protect against chronic diseases and improve overall wellbeing.

    View recipe
    No items found.
    • 4 cups powdered sugar
    • 8 oz vegan cream cheese, softened to room temperature
    • 1/2 vegan margarine, softened to room temperature
    • 1/2 teaspoon vanilla extract
    1. Place cream cheese and margarine in standing mixer bowl or in a medium sixed bowl if using a hand electric mixer.
    2. Whip the two ingredients together until smooth.
    3. Add in the vanilla and the powdered sugar one cup at a time whipping it on low speed until completely mixed and then working the speed up too high and allowing it to whip until nice and creamy smooth.
    4. Frost your favorite cooled cake like Vegan Gluten free Carrot Cake or keep in the fridge until ready to use. It will keep up to a week in a sealed container in the fridge.
    Vegan Gluten Free Carrot Cake
    A standing mixing bowl with vegan cream cheese icing
    Plant-based
    Gluten-free

    Vegan Cream Cheese Icing

    Indulge in the creamy delight of vegan cream cheese icing, a dairy-free alternative that's perfect for topping cakes, cupcakes, and other desserts. Made with plant-based cream cheese, dairy-free butter or margarine, powdered sugar, and vanilla extract, this luscious icing offers all the richness and flavor of traditional cream cheese icing without using any animal products. Whether you're following a vegan lifestyle or have dairy allergies, vegan cream cheese icing provides a deliciously decadent finishing touch to your favorite baked treats. Enjoy the smooth texture and delightful sweetness of this versatile icing, guilt-free and cruelty-free.

    View recipe
    Soup
    • 2 1/2 teaspoons sea salt
    • 1 small yellow onion, sliced into strips
    • 2 garlic cloves, minced
    • 1 1" piece of ginger, minced
    • 1 green onion, chopped
    • 12 oz gluten free ramen
    • 2 tablespoons light tasting olive oil
    • 1 28oz can of diced tomatoes
    • 4 cups low sodium vegetable broth
    • 3/4 - 1 cup "Just Egg" replacer
    • pinch of freshly grund white pepper
    • 3 tablespoon brown sugar
    • toasted sesame oil or chili oil
    • soy sauce for serving
    1. In a small Dutch oven or large saucepan fill with water 3/4 full , season with 1 teaspoon of the salt and bring to a boil.
    2. While water comes to a boil, prep your vegetables.
    3. When water is boiled add your ramen and cooked until tender.
    4. Drain the ramen and rinse under cold water and set aside.
    5. Using the same pot heat the olive oil. Add the onion and cook until translucent. Add the garlic and ginger and cook until fragrant.
    6. Add the can of tomatoes and the vegetable broth. Reduce heat to medium, cover pot with lid and cook until flavors come together. approximately 1- 15 minutes.
    7. Meanwhile whisk 1 teaspoon salt and the pepper into the "eggs" into a measuring cup with a pouring spout.
    8. Uncover the broth and stir in the sugar and salt if needed. The broth should be slightly sweet but a little tart.
    9. Increase the heat and bring the soup to a boil. Very slowly pour the egg mixture into the broth. Do not stir. Allow t cook for 1 minute.
    10. Remove the pot from the stove.
    11. Rinse the noodles again under water to loosen. Divide the noodle amongst four bowls and ladle the soup over the noodles. Drizzle the soup with the sesame or chili oil, soy sauce and top with green onions.
    12. Enjoy!
    A bowl of homemade egg drop soup
    Plant-based
    Gluten-free

    Vegan Egg Drop Soup ~ Tomato Based

    Savor the comforting warmth of our Vegan Egg Drop Soup with a delightful twist – a rich and savory tomato base. Crafted with care and compassion, this soup offers a tantalizing blend of flavors and textures that will satisfy both the palate and the soul. Ripe tomatoes form the foundation of this nourishing soup, infusing it with a burst of natural sweetness and vibrant color. Enhanced with aromatic herbs and spices, such as garlic and ginger, the broth tantalizes the taste buds with its aromatic complexity.

    View recipe
    Beverages

    Margaritas

    • 1 ripe mango cubed, approximately 1 cup
    • 1 cup orange juice
    • 2 small limes juiced, approximately 1 oz
    • 2.5 - 3 oz tequila or less if desired
    • 1 oz triple sec
    • 1 dash hot sauce
    • 1 - 3 tablespoons agave syrup

    Chili Salt Rim

    • 1 lime wedge for rimming
    • 1 teaspoon chili powder
    • 1/4 teaspoon sea salt
    1. Add all the margarita ingredients to a blender like a Vitamix and blend until creamy and smooth.
    2. You can add a handful of ice to the blender to make a frozen margarita or place the mix in a cocktail shaker with a handful of ice an shake vigorously.
    3. Mix the chili salt rim ingredients in a small bowl and then pour them onto a small plate or shallow bowl.
    4. Using a lime wedge, rub it around the rim of your serving glass then dip it into the chili salt.
    5. Add a couple ice cubes to the glass and then pour in the mango margarita mix and garnish with a lime wedge.

    *if making a frozen margarita you can also use frozen mango chunks in place of the fresh mango and omit the handful of ice.

    A spicy rimmed glass with spicy margarita
    Plant-based
    Gluten-free

    Spicy Mango Margarita

    The spicy mango margarita is a refreshing and flavorful twist on the classic margarita cocktail. It typically combines the sweetness of ripe mangoes with the tanginess of lime juice, along with the kick of spicy elements such as chili sauce. This cocktail is often made by blending or shaking together mango puree, fresh lime juice, tequila, triple sec, and a spicy element. The result is a vibrant and zesty drink with a perfect balance of sweetness, tartness, and heat, making it a delightful choice for those who enjoy a bit of spice in their cocktails. Garnishes like chili salt rims and lime slices add an extra touch of flavor and presentation to this tropical-inspired beverage.

    View recipe
    Beverages
    • 1 1/4 cup filtered warm water
    • 2 teaspoons finely chopped fresh organic ginger
    • 2 teaspoons organic white or unrefined sugar
    • extra ginger and sugar to feed the bug
    1. In a sterilized 500 ml mason jar with lid add all the ingredients.
    2. Shake well until all the sugar is dissolved.
    3. Place in a warm spot 72- 80 degrees F) for 24 hours.
    4. the next day feed it by adding another two teaspoons each of the chopped ginger and sugar.
    5. Repeat this step for the next 3-5 days.
    6. It is ready to use when you see bubbles forming.

    *do not use chlorine water or softened water as it will kill the fermentation process.

    *always use very clean utensils to prevent contamination.

    *not sure what to use the ginger bug for? Check out this blog for ideas!

    A jar of fresh chopped ginger in water with sugar, called a ginger bug for making gingerale or fermented drinks.
    Plant-based
    Gluten-free

    Ginger Bug Recipe

    Homemade ginger bug is a natural starter culture used to make fizzy ginger ale, root beer, and other probiotic-rich drinks. Made with grated ginger, sugar, and water, this fermenting agent creates effervescence and adds beneficial bacteria, resulting in delicious and healthful homemade beverages.

    View recipe
    Savoury

    Cashew Cream Sauce

    • 1 cup raw cashews, soaked then drained
    • 3 tablespoons lemon juice
    • 1/4 cup nutritional yeast
    • 1/2 teaspoon garlic powder
    • salt to taste

    Mexican Rice and Beans Casserole

    • 1 small red onion, diced
    • 1 tablespoon olive oil
    • 2 teaspoons cumin
    • 1 teaspoon chili powder
    • 1 teaspoon smoked paprika
    • 1/2 teaspoon salt and pepper
    • 1 teaspoon dried oregano
    • 1 red bell pepper diced
    • 1/2 green pepper, diced
    • 1/2 jalapeno pepper, diced
    • 1 cup corn kernels
    • 1 (15oz) can of black beans, drained and rinsed
    • 1 cup salsa (temp of choice)
    • 1 1/2 cups chopped tomatoes
    • 1 1/2 cups cooked rice
    • 1/2 cup shredded vegan cheese

    Cashew Cream Sauce

    1. Combine all of the ingredients in your Vitamix blender (or high powered blender) with 1/4 cup water.
    2. Add more water to thin and add salt to taste.
    3. To store leftovers, place in a sealed container and store in the fridge.

    Rice and Bean Casserole

    1. Heat a large skillet over medium heat.
    2. Add the olive oil and onion, cook for 3 minutes, then add all the spices, stir together and cook through.
    3. Now add all the peppers and stir. Cook for another 3 minutes.
    4. Add the beans, corn, salsa, tomatoes and rice. Stir until well combined.
    5. Place mixture in casserole dish and top with vegan cheese.
    6. Place the skillet in the oven and broil for about 3-4 minutes.
    7. Serve warm with diced green onions adn avocado.
    8. Top with cashew cream sauce after serving.
    Mexican Rice and Beans Casserole with Creamed Cashew Sauce
    Plant-based
    Gluten-free

    Mexican Rice and Beans Casserole with a Creamy Cashew Sauce

    Mexican rice with beans and a creamy cashew sauce is a delicious and satisfying dish that combines the heartiness of rice and beans with the richness of a cashew-based sauce. The Mexican rice is typically infused with flavorful spices, such as cumin and chili, providing a savory backdrop to the dish. The inclusion of beans adds protein and fiber, contributing to its nutritional value. The creamy cashew sauce introduces a velvety texture and nutty taste, enhancing the overall taste experience. This dish not only offers a delightful fusion of textures and flavors but also provides a wholesome and balanced meal suitable for vegetarians or those seeking a plant-based option.

    View recipe
    Beverages
    Breakfast
    Canning & Preserving
    Dessert
    • fresh pineapples
    • filtered water
    • organic cane sugar (or white sugar)
    • use a ratio of 1:5 for the sugar and water (meaning 1 cup sugar to 5 cups water)
    1. Wash all your pineapples that you will be canning. Either with warm water or in a warm water bath with 1/4 cup vinegar and 1 tablespoon baking soda sprinkled in the water. Then rinse your pineapples well.
    2. Remove pineapple tops and add to your compost. Remove the skins and cores and set aside in large pot. (to make juice later)
    3. In a small pot add water and sugar and bring to a light boil to dissolve the sugar, stirring occasionally. Keep on a very low simmer to keep it hot. Make sure you have enough water sugar mixture that will cover your pineapple when you add them next.
    4. Chop or mince your pineapple and place into the sugar syrup and allow to simmer for 10 minutes.
    5. Place your pineapple and syrup mixture into hot sterilized jars, leaving 1/2 inch head space, remove air bubbles (use a chop stick and stick down inside the sides of the jar to remove bubbles), wipe rims clean with a cloth with a little vinegar on it and place your seal and finger tighten the rims onto the jars. (make sure seals and rims have been washed with hot soapy water and rinsed well, do not boil seals to sterilize)
    6. Place your jars of pineapple in your hot water bath making sure the water covers the jars by one inch. Bring to a boil and allow to boil for 20 mins for 250 ml jars. Turn off the heat and allow to sit for 5 minutes before removing the jars.
    7. Place on your counter undisturbed for 24 hours. Remove rings and check each jar to make sure they have sealed. Wipe down the jars, label and place in your storage and use within a year.
    8. Any unsealed jar can be either re bathed or placed in your fridge and use within a week.
    9. To make pineapple juice, cover your cores and peels with filtered water and bring to a boil, reduce heat and allow to simmer for 30 -45 mins. You can add a little sugar if you desire.
    10. Strain or remove the cores and place your hot juice into hot sterilized jars and repeat the same water bath process as the fruit above.

    *making the juice is a great way to increase the use of your pineapples an you will also get all of the beneficial healthy ingredients pineapples have to offer in a more natural state than when buying store bought juice. Use as you would any pineapple juice.

    jars of canned crushed pineapple, chunks of pineapple and pineapple juice
    Plant-based
    Gluten-free

    Canned Pineapple

    Homemade canned pineapples involve peeling, coring, and packing fresh pineapple chunks in a syrup or juice, then processing them in a water bath canner for preservation. The health benefits of canned pineapples include providing vitamins, minerals, and antioxidants like vitamin C and bromelain, which may support digestion and reduce inflammation. Making juice from the core of a pineapple involves boiling the core and peels with water and straining it. The core contains bromelain and fiber, potentially offering similar health benefits as the fruit itself, including aiding digestion and providing anti-inflammatory properties.

    View recipe
    Breakfast
    Dessert

    Oat Base

    • 4 cups gluten free oats
    • 2 1/2 cups nut butter of your choice
    • 1/2 cup organic maple syrup

    Raison Dates & Walnuts

    • 1 cup raisons
    • 1 cup chopped medjool dates
    • 1 cup chopped walnuts

    Double chocolate

    • 4 tablespoons Organic Cocoa
    • 1 cup vegan gluten-free mini chocolate chips
    • 1 cup coconut flakes

    Base

    1. Start by making your base, in a medium sized bowl add your gluten-free oats.
    2. In a separate microwaveable bowl soften your nut butter (this will only take up to 30 seconds, depending on the microwave you use) then place it in your Vitamix Blender (or any high powered blender) with the maple syrup and blend until smooth.
    3. Add the nut butter mixture to your oat base.
    4. Now add the flavor ingredients of your choice to the base mixture and stir to blend well.
    5. Roll the mixture into balls about 1 inch and enjoy!
    6. Some ingredients may need to be adjusted for added or lessened moisture depending on the type of oat flakes you use.
    7. Keep in a sealed container on the counter for a few days or you can just place them straight away in the fridge to last longer.
    A platter of chocolate energy balls and oat and raison energy balls
    Plant-based
    Gluten-free

    Double Chocolate & Raison Date & Walnut Energy Balls

    These no-bake energy balls are not only delicious but also provide a good mix of carbohydrates, healthy fats, and protein. They make for a convenient snack on the go or a pre- or post-workout fuel option.

    View recipe
    Beverages
    Fermentation
    • 7 cups of filtered water
    • 1/2 cup cane sugar
    • 4 black tea bags
    • 1 cup store bought Kombucha plain unpasteurized (preferably with the little bits floating around the bottom of the bottle)
    1. Steep the tea bags in your boiled filtered water for 20 minutes.
    2. Remove the tea bags and add your sugar. Stir until the sugar dissolves completely.
    3. Set your tea aside and allow it to cool to below 90 degrees.
    4. Once your tea has cooled pour the liquid into big canning jar that has been cleaned and sterilized.
    5. Now add the store bought kombucha with the small bits in the bottom of the jar to your tea mixture and stir using a wooden spoon.
    6. Cover your sweetened tea mixture with a clean coffee filter and secure with a rubber band. Now store this mixture in a room temp area out of sunlight for two to four weeks.
    7. Check it every day until bubbles form on the surface of the tea and a thin whiteish jelly like film forms across the top of the liquid and the film becomes almost fully opaque in color.
    8. The Scoby is ready when it has grown to into a 1/4 inch thick puck.
    9. If you see bubbles forming later in development especially in later stages of Scoby formation that a good sign of carbon dioxide development. If you see white or green fuzzy growing your Scoby is growing mold and you must throw it out and start again, but this is rare.
    Fully Formed Scoby ready for making Kombucha
    A jar of black tea, sugar and water fermenting to grow a scoby to make homemade Kombucha.
    Plant-based
    Gluten-free

    Scoby - For Kombucha

    A SCOBY (Symbiotic Culture Of Bacteria and Yeast) is a living culture used to ferment kombucha tea. It's a thick, rubbery disc that floats on the surface of the tea during fermentation. The health benefits of kombucha primarily come from its probiotic content, which supports gut health and digestion, as well as potential antioxidant properties that could offer immune system support. To making a homemade kombucha SCOBY at home is as easy as combining brewed black or green tea with sugar and a small amount of store-bought kombucha as a starter culture. Cover the mixture with a breathable cloth and let it ferment for 1-4 weeks until a thick, rubbery disc forms on the surface, which is your SCOBY. Then proceed to make your own Kombucha at home!

    View recipe
    Beverages
    Fermentation
    • 4 cups filtered water for brewing tea
    • 6-8 black tea bags, (you can also use green tea bags or mix both flavors of tea bags)
    • 1 cup organic cane sugar
    • 10 cups total of cold water
    1. Bring your filtered water to a boil on medium high heat and add your tea bags. Remove from heat.
    2. Allow to steep for 20 minutes.
    3. Now remove the tea bags and add 1 cup organic cane sugar and 8 cups of cold filtered water.
    4. Stir to dissolve all sugar crystals.
    5. Transfer the sweetened tea to a jar or glass container. Using a wide mouth container will be better for air flow.
    6. Now add 1-2 cups of cold water.
    7. Make sure your tea is close to room temperature by the time you add the Scoby - warm tea will harm it. Temperature should be below 90 degrees F.
    8. Add your Scoby to the jar of sweet tea along with 1 1/2 cups of the starter liquid that is with your Scoby. If your Scoby doesn't have enough starter liquid you can substitute with a store bought Kombucha.
    9. Cover your container now with a clean material such a lint free tea towel, old clean pillow case or I find the reusable bamboo paper towels work best. Secure with a string or rubber band to prevent fruit flies etc. to enter your Scoby. Do not use cheesecloth as flies can enter the cloth.
    10. Now that your Scoby is in the tea, you have to cover the jar so that the Scoby is neither vulnerable to contamination nor suffocation.
    11. Place your sweetened tea with the Scoby in a dark location with a temperature that's under 90 degrees F with good air circulation and little direct sunlight- it will be 1 - 4 weeks until its ready to drink.
    12. During this time your Scoby will grow into a thicker leathery, white mass across the surface of the tea.
    13. You might notice some discolored spots, these are natural which are from dying yeast cultures. Mold will look like fuzzy green stuff. If you suspect mold you will have to throw out your Scoby and tea and start again growing a new Scoby to make Kombucha.
    14. After one week try your Kombucha, if your happy with the flavor transfer your Scoby to a jar with 1 1/2 - 2 cups of the brewing liquid (this will be your Scoby's home and you'll use that liquid to start your next batch). Cover with tea towel and rubber band just as before and set it aside.
    15. Transfer your Kombucha to flip top brew bottles. Fill one plastic bottle with Kombucha as this will be your tester to tell when it is carbonated enough during second fermentation. As it enters a second fermentation and it will become drier (less sweet) and carbonated.
    16. This is also when you can add flavor to your Kombucha.
    17. Some flavors you could try are: ginger and lemon, grapefruit, mango, mango and orange juice blend, rhubard lime, blueberry etc. There are so many possibilities. Use organic fruit or fruit juice when adding to your Kombucha.

    *open bottles of Kombucha over a sink in case it is over carbonated

    *always use very clean items when making Kombucha.

    a dispensing jar with tea fermenting to make homemade Kombucha
    Plant-based
    Gluten-free

    Kombucha

    Homemade kombucha is a fermented tea beverage rich in probiotics, antioxidants, and organic acids. It may support gut health, aid digestion, boost the immune system, aid detoxification, and potentially reduce the risk of certain diseases. It's easy to make at home and much more affordable than store bought and you can flavor to your liking.

    View recipe
    Beverages
    Breakfast
    • 2 cups non dairy milk
    • 1/4 teaspoon ground turmeric
    • 1/2 fresh ginger or 1/8 teaspoon ground ginger
    • pinch of ground cinnamon
    • pinch of black pepper
    • 1 teaspoon honey optional
    1. Using a small saucepan on medium heat place all ingredients in the pan.
    2. Mix well and allow to simmer until it is heated through.
    3. You can use a small handheld frother in the mix while it is heating. This will create an abundance of froth.
    4. Once heated, remove from stove and pour into two mugs.
    5. Scoop any left behind froth on top of the drink.
    6. Sprinkle a small amount of cinnamon on top and serve.
    7. Enjoy!

    *If using freshly grated ginger pour the heated mixture through a strainer.

    *This can also be served over ice, allow the mixture to cool before using.

    A mug full of warm comforting golden milk also knowns as Turmeric Latte
    Plant-based
    Gluten-free

    Golden Milk

    Golden Milk, also known as "Turmeric Latte," is a warm and comforting beverage that has gained popularity for its enticing flavor and potential health benefits. The key ingredient in golden milk is turmeric, a vibrant yellow spice known for its anti-inflammatory and antioxidant properties. Traditionally combined with warm milk (dairy or plant-based), a touch of sweetener, and aromatic spices like ginger and cinnamon, golden milk offers a soothing and flavorful experience. This ancient Ayurvedic drink has roots in traditional Indian medicine, where turmeric has been revered for its healing properties for centuries. Beyond its rich and exotic taste, golden milk is celebrated for promoting well-being and providing a cozy and nourishing respite. Whether enjoyed as a bedtime ritual or a daytime treat, golden milk has become a beloved beverage, offering a delightful combination of warmth, spice, and wellness in every sip.

    View recipe

    Embracing a plant-based lifestyle was my conscious choice to nourish not only my body but also my values. It's a journey that not only revitalizes my health but also connects me to a world of compassion and sustainability.

    Back to top